Introduction
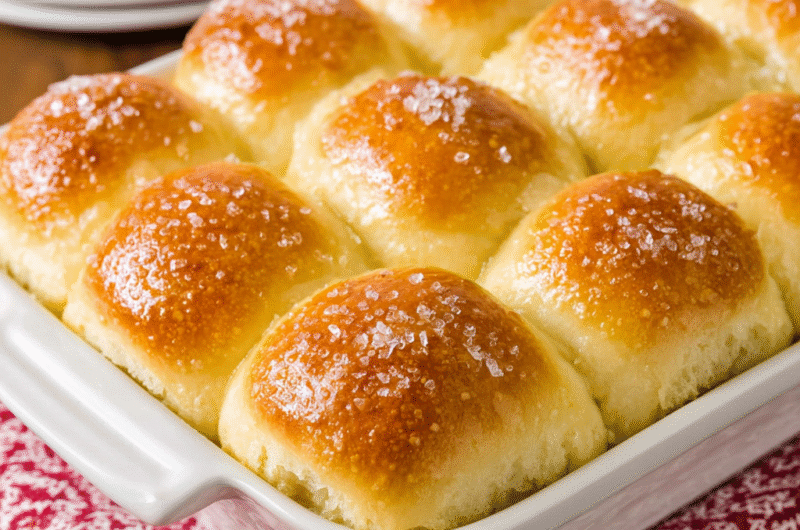
There's something remarkable about homemade dinner rolls that can elevate any meal from ordinary to exceptional. These fluffy rolls, with their tender texture and subtle, buttery flavor, make the perfect addition to family dinners, holiday feasts, or even casual get-togethers.
Making dinner rolls from scratch may seem daunting, but with a bit of patience and the right ingredients, you can achieve a bakery-worthy result in your own kitchen. These rolls are not just a side; they can play a starring role on your table, beckoning for butter or your favorite spread.
Ingredients
- 4 cups all-purpose flour
Flour provides the structure for the rolls, allowing them to rise and maintain their shape. Using all-purpose flour strikes a balance between adequate gluten development and tenderness, ensuring a fluffy interior. - 1/4 cup granulated sugar
Sugar serves two main purposes—sweetening the rolls and feeding the yeast. This helps in creating that light, airy texture we desire, while also contributing to a beautiful golden crust when baked. - 1 tablespoon instant yeast
Active yeast is essential for fermentation, helping the dough rise. Instant yeast offers convenience and faster results, making it a reliable option for busy home cooks. - 1 teaspoon salt
Salt enhances flavor and strengthens the gluten structure in the dough. Proper seasoning is critical, as it balances the sweetness from sugar and heightens the overall flavor of the rolls. - 1 cup warm milk (110°F)
Warm milk hydrates the flour and activates the yeast, creating a tender crumb. It also enriches the dough, resulting in a richer taste and texture. - 1/4 cup unsalted butter, melted
Butter adds richness and moisture to the rolls, contributing to a soft texture. When brushed on top before baking, it creates a beautifully golden and shiny finish. - 2 large eggs
Eggs enrich the dough, adding flavor and promoting a tender texture. They also aid in binding the ingredients together and enhance the rise during baking.
Directions & Preparation
Step 1: Mix the dry ingredients.
In a large mixing bowl, whisk together flour, sugar, instant yeast, and salt. This ensures these elements are evenly distributed throughout the dough. Utilizing instant yeast helps eliminate concerns about the temperature of the liquid, streamlining the mixing process.
Step 2: Combine wet ingredients.
In a separate bowl, beat the eggs and mix them with warm milk and melted butter. Adding the eggs at this stage helps to emulsify the fats and liquids, resulting in a smooth and homogenous dough that encourages even rising.
Step 3: Incorporate wet into dry ingredients.
Pour the wet mixture into the dry ingredients and stir until a shaggy dough forms. This initial mixing starts the hydration process, allowing the flour to absorb the moisture needed for proper gluten development.
Step 4: Knead the dough.
Turn the dough onto a floured surface and knead for about 8-10 minutes, until it's smooth and elastic. Kneading develops gluten, which provides the chewiness necessary for the rolls while allowing for optimal rising.
Step 5: First rise: let dough proof.
Place the kneaded dough in a greased bowl, cover it with a cloth, and let it rise in a warm place for about an hour, or until doubled in size. This fermentation process allows yeast to work its magic, causing the dough to expand and develop flavors.
Step 6: Shape the rolls.
Once the dough has risen, punch it down to release excess gas and divide it into equal portions. Shape each piece into a smooth ball and arrange them in a greased baking dish. This ensures even rising and baking, as well as a beautiful presentation.
Step 7: Second rise: allow to rise again.
Cover the shaped rolls and let them rise for another 30-45 minutes. This second proof further enhances the rolls' softness, ensuring a light texture once baked. This step is essential for maximizing their fluffiness.
Step 8: Preheat oven and bake.
While the dough undergoes its second rise, preheat your oven to 375°F. Bake the rolls for 20-25 minutes, or until they are golden brown. Monitoring the color helps avoid over-baking, which could dry them out.
Step 9: Brush with butter and cool.
After removing the rolls from the oven, brush them with melted butter for added flavor and texture. Let them cool in the pan for a few minutes before transferring to a wire rack, preventing sogginess while maintaining their fluffy nature.

Achieving the Perfect Texture
To nail the fluffy texture that everyone craves, kneading is vital. The act of kneading creates gluten strands, allowing the dough to trap air bubbles generated by the yeast. This process leads to a tender crumb that isn’t dense. If the dough feels too sticky during kneading, a light dusting of flour can help without compromising the recipe.
Flavor Boosting Techniques
Infusing additional flavors into your dinner rolls can transform them from simple sides to memorable treats. Consider incorporating herbs, garlic, or cheese into the dough. Adding herbs can provide a subtle freshness, whereas cheese adds richness. A sprinkle of herbs on top right before baking can also enhance the aroma and presentation.
The Importance of Proper Rising
The rising process significantly impacts the rolls' final texture. Each rise allows the yeast to work and develop flavors. Factors like temperature and humidity can affect rising times. If you find your rolls aren’t rising as expected, double-check the yeast's freshness and ensure the environment is warm enough.
FAQs
What if my dough doesn’t rise as expected?
Ensure your yeast is fresh and that the liquids used were warm, not hot. A warm environment is essential for optimal rising.
Can I incorporate whole wheat flour?
Yes, you can substitute part of the all-purpose flour with whole wheat flour. Keep in mind that this may change the texture, making it slightly denser.
My rolls are too dense. What happened?
Density could result from insufficient kneading or rising time. Make sure to knead until elastic and allow enough time for both rises.
How can I make smaller rolls or sliders?
Simply divide the dough into smaller portions before shaping. Adjust baking time based on size; smaller rolls will bake more quickly.
What if the rolls come out bland?
Ensure you use the recommended amount of salt and sugar. An additional herb or seasoning in the dough can also enhance the flavor.
Can I add fillings to the rolls?
Absolutely! Consider filling them with cheese, garlic butter, or your favorite jam after shaping but before the second rise.
Conclusion
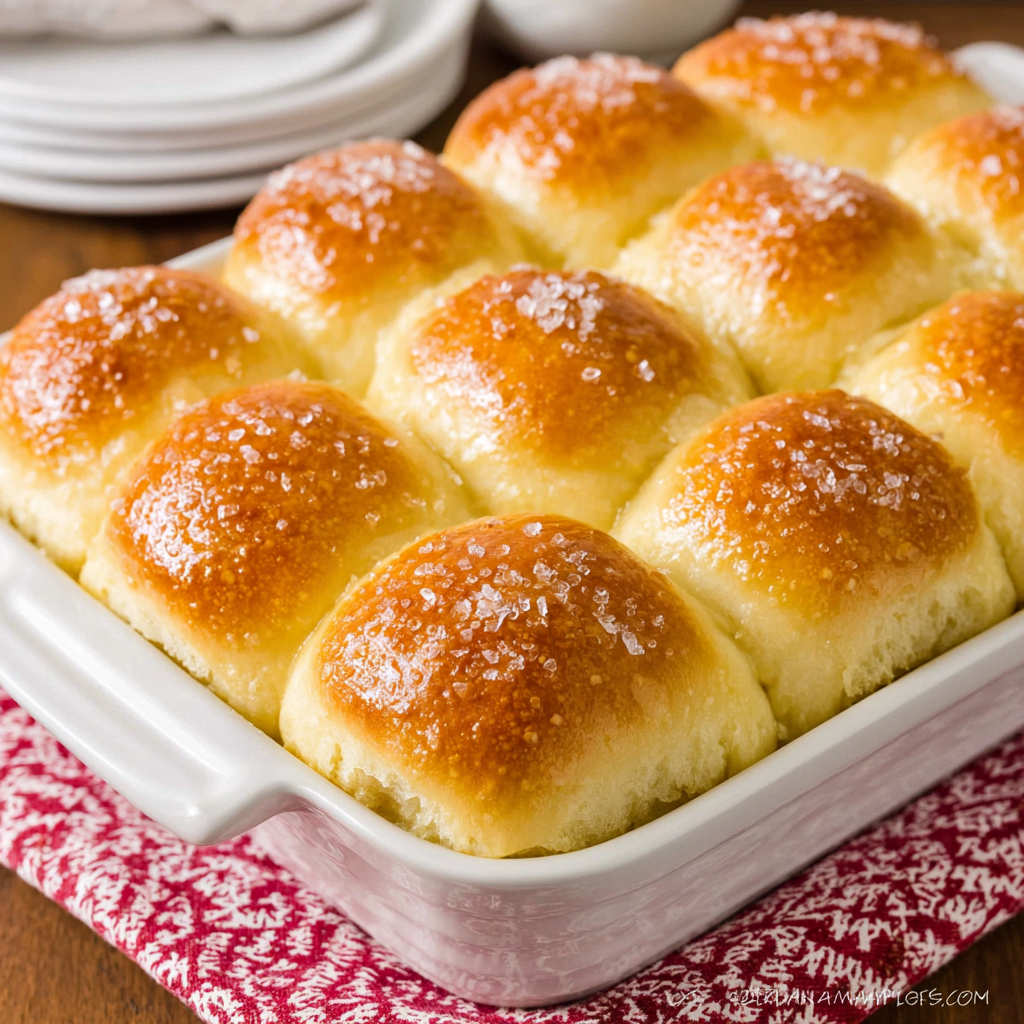
Homemade fluffy dinner rolls can transform any dining experience, inviting your family and friends to gather around the table. With a few key techniques, anyone can master the art of roll-making, delighting their loved ones with soft, warm bread.
Experiment with flavors and pair these rolls with soups, stews, or simply a good butter. The versatility and satisfying nature of these rolls will soon make them a staple in your home cooking repertoire.
Recipe Card
Light and Airy Dinner Rolls for Every Meal
Ingredients
Method
- Mix the dry ingredients.
- Combine wet ingredients.
- Incorporate wet into dry ingredients.
- Knead the dough.
- First rise: let dough proof.
- Shape the rolls.
- Second rise: allow to rise again.
- Preheat oven and bake.
- Brush with butter and cool.
Notes
Additional serving suggestions: pair with a crisp salad, garlic bread, or roasted seasonal vegetables for balance.
For make-ahead, prep components separately and assemble just before heating to preserve texture.
Taste and adjust with acid (lemon/vinegar) and salt right at the end to wake up flavors.


