Introduction
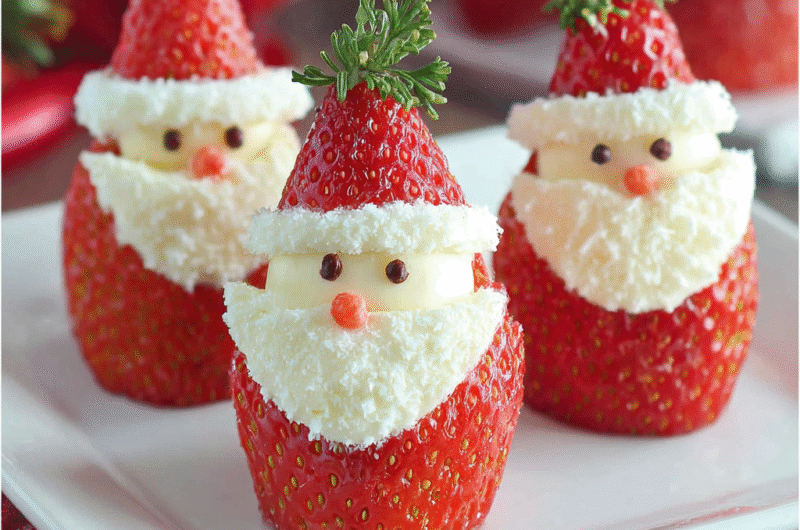
The holiday season brings with it a flurry of festivities, and what better way to spread cheer than with fun and whimsical treats? Strawberry Santas are a delightful fusion of healthy fruit and festive fun, perfect for holiday gatherings or as a cheerful snack for the kids. Not only are they visually appealing, but they are also incredibly simple to make, bringing the joy of Christmas right to your kitchen.
These charming little creations use fresh strawberries to resemble Santa Claus, making them a delightful and healthy alternative to heavy desserts. With just a few ingredients, you can create a festive treat that will have everyone smiling and feeling the holiday spirit. Let’s embark on this fun culinary adventure together!
Ingredients
- 24 large strawberries
The star of the show, strawberries provide a vibrant color and a sweet, juicy taste. Selecting large ones with a vibrant red color ensures your Santas will look festive and appealing. Fresh, firm strawberries also lend themselves well to being sculpted into Santa shapes. - 1 cup whipped cream
Whipped cream adds a rich and fluffy texture that mimics the soft details of Santa's beard and fur trim. It also balances the tartness of the strawberries with its creamy sweetness, making each bite delectably indulgent. - 12 mini chocolate chips
These tiny treats serve as eyes for the Santas, providing a hint of chocolate flavor that complements the sweetness of the strawberries. Their small size makes them perfect for adding character without overwhelming the festive look. - 24 slivers of almonds or candy pieces
Almond slivers or candy pieces function as Santa's hats, adding a crunch to each bite while giving a playful contrast in texture. They also enhance the visual appeal, completing the Santa design beautifully.
Directions & Preparation
Step 1: Prepare the strawberries by washing and drying them thoroughly.
Start by rinsing the strawberries under cold water to remove any dirt or residues from pesticides. Drying them completely is crucial because moisture can prevent the whipped cream from adhering properly, impacting the overall presentation of your Strawberry Santas.
Step 2: Cut the tops off the strawberries, creating a flat base.
By removing the leafy tops, you establish a stable base for each Santa. The flat bottom ensures that your Santas can stand upright without any wobbling, making them easy to decorate and display. Keep the tops to use as hats later.
Step 3: Pipe or spoon whipped cream onto the top of the strawberries.
Using a piping bag or simply a spoon, add a generous dollop of whipped cream over each strawberry. This represents Santa’s beard and adds a delightful creaminess that enhances the overall flavor. Be creative with your piping to give each Santa a unique style!
Step 4: Add the chocolate chips as eyes.
Gently press two mini chocolate chips into the whipped cream to create the eyes. This simple step brings your Santas to life, adding personality to each one. Ensure the chocolate chips are placed firmly, so they don’t fall off during serving.
Step 5: Place almond slivers or candy pieces on top for hats.
Finish decorating by adding almond slivers or a fun piece of candy atop the whipped cream. This will resemble Santa's hat, completing the festive look of your Santas. The contrast of creamy whipped cream with the crunch of nuts or candy adds an enjoyable texture to each bite.
Step 6: Chill the assembled Strawberry Santas until ready to serve.
To ensure that your Strawberry Santas hold their shape, chill them in the refrigerator for a brief period before serving. This not only helps maintain their integrity but also makes them refreshing and cool, perfect for a festive holiday treat.

Tips for Choosing the Perfect Strawberries
Selecting the right strawberries is essential for creating stunning Strawberry Santas. Look for strawberries that are bright red, firm to the touch, and free of blemishes. Larger strawberries work best as they provide ample room for decorating and resemble Christmas cheer more closely. If possible, visit a local farmer’s market for the freshest picks and to support local agriculture during the holiday season!
Creative Variations for Festive Flavors
While this recipe gives you the classic Strawberry Santa, feel free to experiment with other fruits for variety. Bananas and marshmallows can create a different holiday character, while blueberries can add to the ensemble as little ornaments at the base. Don’t hesitate to use flavored whipped cream or add a hint of vanilla or peppermint to define your own festive twist this holiday season!
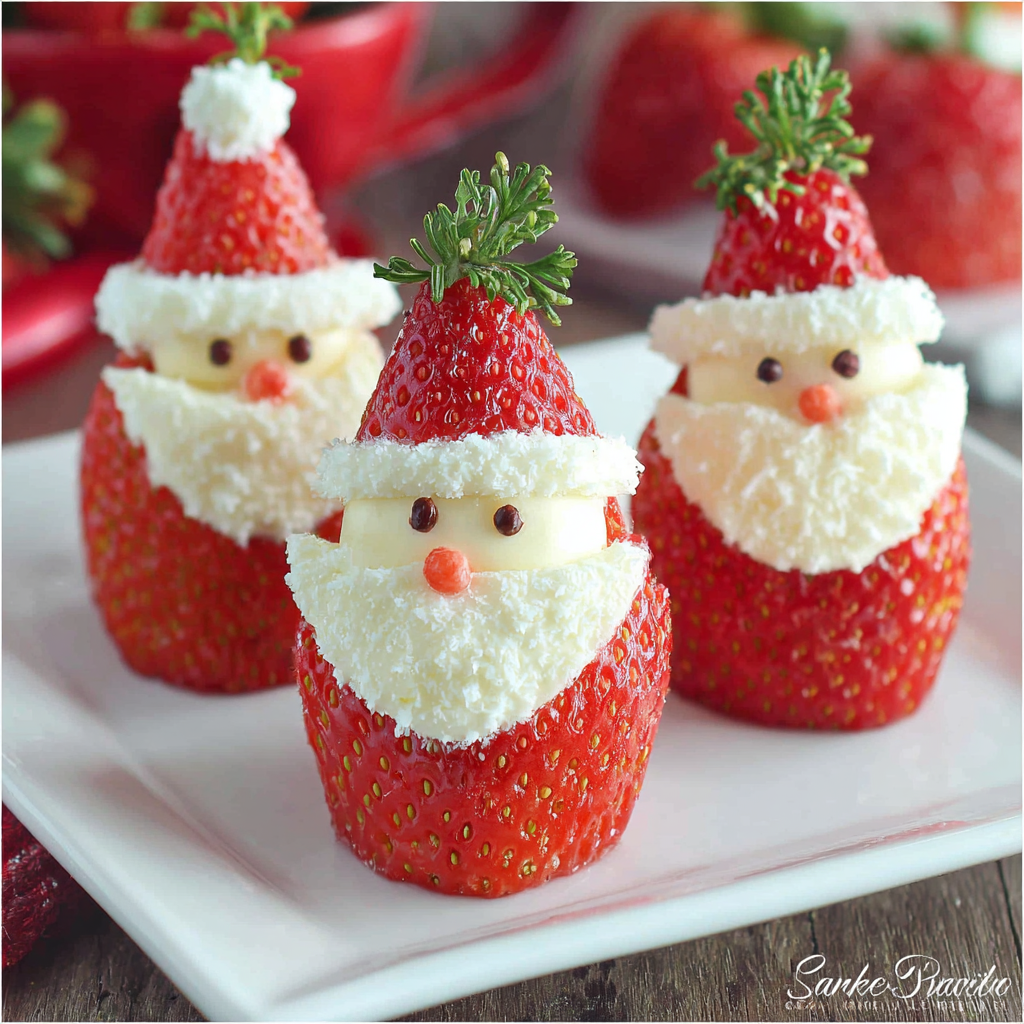
Presentation Ideas to Wow Your Guests
The key to a memorable presentation is in the details. Arrange your Strawberry Santas on a festive platter lined with holiday-themed napkins or greenery. Surround them with mini candy canes or a sprinkle of powdered sugar resembling snow for an even more enchanting display. This little touch elevates your dish from a simple treat to a centerpiece that guests will admire even before tasting!
FAQs
What should I do if the whipped cream is too runny?
If the whipped cream appears to be too runny, revisit your whipping technique. Ensure you're using heavy whipping cream and whip it until soft peaks form, which allows it to hold shape better. Chilling the cream and bowl before whipping can help stabilize it as well.
Can I use non-dairy whipped cream for these Santas?
Absolutely! Non-dairy whipped cream options are widely available and can provide similar texture and taste. Ensure you select a brand that whips well to achieve the fluffiness needed for your Strawberry Santas.
What if my strawberries are too small?
If your strawberries are smaller than desired, consider using them to create mini Santas or arrange them in groups to maintain a balance of presentation. Look for other larger fruits that can complement or enlarge the serving size without losing the overall theme.
How can I scale this recipe for a larger party?
Scaling this recipe is simple! Maintain the same ratio of strawberries, whipped cream, chocolate chips, and almonds, and multiply the amounts based on the guest count. Just ensure you have ample space on your serving platters to accommodate the extra Santas.
Can I add extra decorations to the Santas?
Definitely! Get creative by adding edible decorations like dusted powdered sugar for snow, or use colorful candies to create fun accessories. This not only personalizes your Santas but also attracts playful attention from guests.
What do I do if my strawberries start to leak juice?
If your strawberries begin to leak juice, try refrigerating them immediately after preparation. This should slow the process. Alternatively, serve them soon after assembling to keep their freshness intact, enhancing the overall presentation.
Conclusion
Incorporating Strawberry Santas into your holiday festivities is a delightful way to add sweetness and creativity to any gathering. This simple yet imaginative recipe is perfect for children and adults alike, and it encourages a little hands-on fun in the kitchen.
So gather your ingredients, invite the family to join in the fun, and let Strawberry Santas fill your home with laughter and cheer this holiday season! May each bite be a celebration of joy and togetherness.
Recipe Card
Delightful Strawberry Santas for Holiday Fun
Ingredients
Method
- Prepare the strawberries by washing and drying them thoroughly.
- Cut the tops off the strawberries, creating a flat base.
- Pipe or spoon whipped cream onto the top of the strawberries.
- Add the chocolate chips as eyes.
- Place almond slivers or candy pieces on top for hats.
- Chill the assembled Strawberry Santas until ready to serve.
Notes
Additional serving suggestions: pair with a crisp salad, garlic bread, or roasted seasonal vegetables for balance.
For make-ahead, prep components separately and assemble just before heating to preserve texture.
Taste and adjust with acid (lemon/vinegar) and salt right at the end to wake up flavors.


