
Introduction
Nothing quite embodies the spirit of the holidays like the joyous crunch of peppermint meringues. These light and airy confections not only taste exquisite but also bring a touch of elegance to any dessert table. With their delicate texture and vibrant flavor, they are perfect for sharing with loved ones or simply treating yourself.
Making meringues may seem intimidating, but with a few simple ingredients and the right techniques, you'll find that creating these delightful treats is both rewarding and enjoyable. The combination of egg whites, sugar, and a hint of peppermint is transformative, resulting in a melt-in-your-mouth experience that everyone will adore.
Ingredients
- 3 large egg whites
Egg whites are the key component in meringues, providing the structure needed for their signature light and airy texture. When whipped, they create stable peaks that hold the meringue together. - 1 cup granulated sugar
Granulated sugar sweetens the meringue and helps to stabilize the egg whites when whipped. This results in a glossy finish and a crispy outer shell, which is essential for that perfect meringue. - 1/4 teaspoon cream of tartar
Cream of tartar is an acid that stabilizes the egg whites, preventing them from collapsing. It also helps to create a smooth texture, ensuring the meringues turn out just right. - 1/2 teaspoon peppermint extract
This extract infuses the meringues with a refreshing peppermint flavor, making them a festive treat. It’s important to use pure peppermint extract for the best taste. - A pinch of salt
Salt enhances the overall flavor of the meringue by balancing the sweetness. It’s a small amount but plays a crucial role in enriching the taste. - Food coloring (optional)
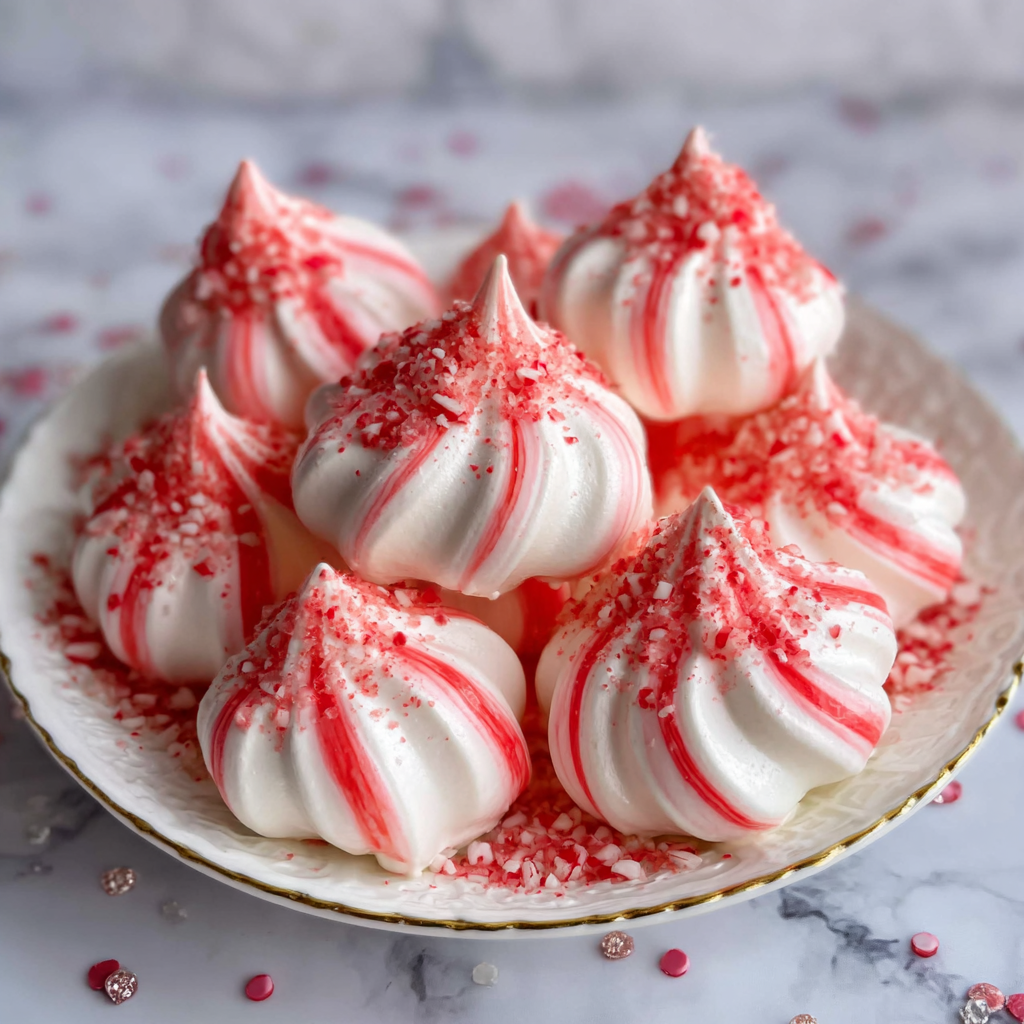
Food coloring can be added to enhance the visual appeal of the meringues. Using a few drops of red or green can make them festive for holidays without affecting the flavor.
Directions & Preparation
Step 1: Preheat your oven to 200°F (93°C).
Preheating the oven ensures that the meringues will cook evenly from the moment they enter. A low temperature is essential for drying out the meringues slowly, which prevents them from browning and maintains their delicate white color.
Step 2: Prep your baking sheets with parchment paper.
Lining your baking sheets with parchment paper provides a non-stick surface for the meringues. This ensures they release easily once baked and prevents any sticking, helping maintain their beautiful shape.
Step 3: In a clean, dry mixing bowl, whip the egg whites and salt on medium speed until foamy.
Starting at medium speed allows the egg whites to progressively aerate. Whipping them until foamy is the first step in achieving stable peaks, which is crucial for the texture of your final meringues.
Step 4: Add cream of tartar and increase to high speed. Continue whipping until soft peaks form.
Cream of tartar helps stabilize the egg whites and makes a noticeable difference in achieving the right consistency. Soft peaks should gently hold their shape but still have a soft edge, which indicates you’re on the right path.
Step 5: Gradually add the sugar, one tablespoon at a time, while continuing to whip.
Adding sugar gradually allows it to dissolve completely into the egg whites, resulting in a smoother meringue. This also helps in achieving a glossy appearance and sturdy peaks that won't collapse.
Step 6: Once all the sugar is added and the meringue is glossy, beat in the peppermint extract and food coloring if desired.
Incorporating the peppermint extract and food coloring at this stage allows for even distribution. The glossy peaks should now be stiff enough to stand tall without falling, showcasing the mixture's stability.
Step 7: Spoon or pipe the meringue onto prepared baking sheets, creating desired shapes.
Whether you use a spoon or a piping bag, aim for uniform sizes to ensure even cooking. Creating swirls or peaks gives each meringue a unique look, adding to their charm and visual appeal.
Step 8: Bake in the preheated oven for 1.5 to 2 hours, or until the meringues are dry to the touch.
Allowing the meringues to bake at a low temperature ensures they dry out completely without browning. This long baking time is key to achieving that signature crisp texture both inside and out.
Step 9: Turn off the oven and let the meringues cool completely inside, preferably overnight if time allows.
Cooling the meringues in the oven prevents any sudden temperature changes which could cause them to crack. This slow cooling phase is vital for ensuring they maintain their structure and texture.
Step 10: Store the cooled meringues in an airtight container until ready to serve.
Proper storage helps keep the meringues fresh and crisp. An airtight container is crucial, as humidity can quickly soften their delightful crunch, ensuring each bite remains as enjoyable as the first.

Crafting the Perfect Meringue: Key Tips
Achieving the perfect meringue requires attention to detail in the whipping process. Make sure your mixing bowl and utensils are free of any grease, as even a small amount can hinder egg white whipping. Additionally, incorporating the sugar gradually while continuing to whip ensures a smooth and stable mixture, resulting in meringues that hold their shape and have a desirable sheen.
Using Peppermint Extract Wisely
Peppermint extract is potent, so a little goes a long way. Too much can overpower the delicate nature of the meringues, making them taste more like candy than a refined treat. Start with the recommended amount, and if you desire a stronger flavor, test a small batch first before increasing the extract in the entire mixture.
Creative Variations on Peppermint Meringues
While peppermint meringues are a delightful treat on their own, there are numerous ways to elevate them. Consider adding crushed peppermint candies on top before baking for a festive crunch, or swap out peppermint for other extracts like vanilla or almond for a different flavor profile. Dipping the bottoms in chocolate after baking can also create a lovely combination of textures and tastes.
FAQs
What if my meringue is too runny?
If your meringue is runny, it may be due to insufficient whipping or the presence of grease. Make sure your bowl and eggs are clean. Whip longer until stiff peaks form.
How can I make smaller meringues?
To create smaller meringues, just adjust the size you pipe or spoon onto the baking sheet. Ensure to reduce baking time slightly as smaller pieces will cook quicker.
What causes meringues to crack?
Cracking can occur due to rapid temperature changes or overbaking. Always cool meringues gradually in the oven and avoid high heat to help maintain their structure.
Can I flavor my meringues differently?
Absolutely! Experimenting with extracts like vanilla, almond, or even citrus can result in unique flavors. Just remember to adjust the amount according to preference.
Why is my meringue not glossy?
If your meringue lacks gloss, it may not have been whipped enough or the sugar was added too quickly. Ensure you whip until shiny and incorporate sugar gradually.
Can I add toppings before baking?
Yes, adding sprinkles or crushed candies before baking can enhance both flavor and presentation. Just be sure they are suitable for heat exposure to avoid melting too much.
Conclusion
Peppermint meringues are more than just a sweet treat; they represent a charming blend of simplicity and elegance that fits perfectly into many celebrations. Whether served at holiday gatherings or enjoyed with a hot beverage, their whimsical nature captivates both the young and the young-at-heart.
With a little practice and a few tips in hand, you can create magical meringues that impress and delight. So, gather your ingredients and get ready to enjoy the satisfying experience of baking these delightful confections.
Recipe Card
Delightful Peppermint Meringues for Every Occasion
Ingredients
Method
- Preheat your oven to 200°F (93°C).
- Prep your baking sheets with parchment paper.
- In a clean, dry mixing bowl, whip the egg whites and salt on medium speed until foamy.
- Add cream of tartar and increase to high speed. Continue whipping until soft peaks form.
- Gradually add the sugar, one tablespoon at a time, while continuing to whip.
- Once all the sugar is added and the meringue is glossy, beat in the peppermint extract and food coloring if desired.
- Spoon or pipe the meringue onto prepared baking sheets, creating desired shapes.
- Bake in the preheated oven for 1.5 to 2 hours, or until the meringues are dry to the touch.
- Turn off the oven and let the meringues cool completely inside, preferably overnight if time allows.
- Store the cooled meringues in an airtight container until ready to serve.
Notes
Additional serving suggestions: pair with a crisp salad, garlic bread, or roasted seasonal vegetables for balance.
For make-ahead, prep components separately and assemble just before heating to preserve texture.
Taste and adjust with acid (lemon/vinegar) and salt right at the end to wake up flavors.


