Introduction
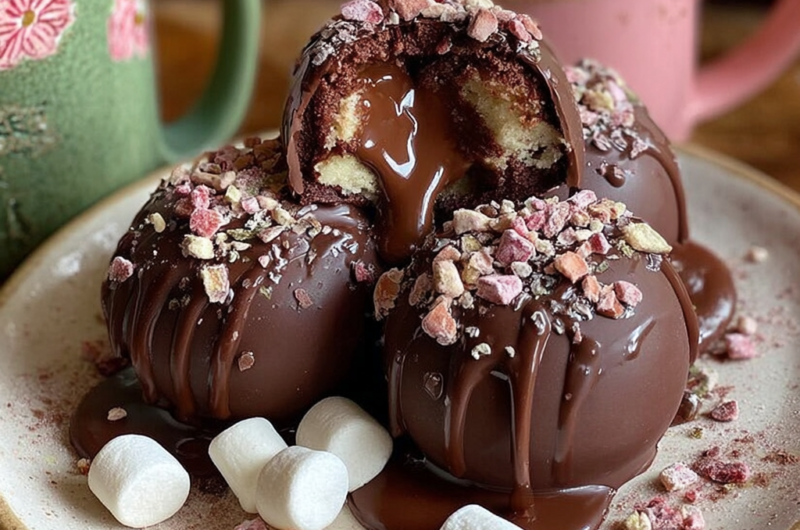
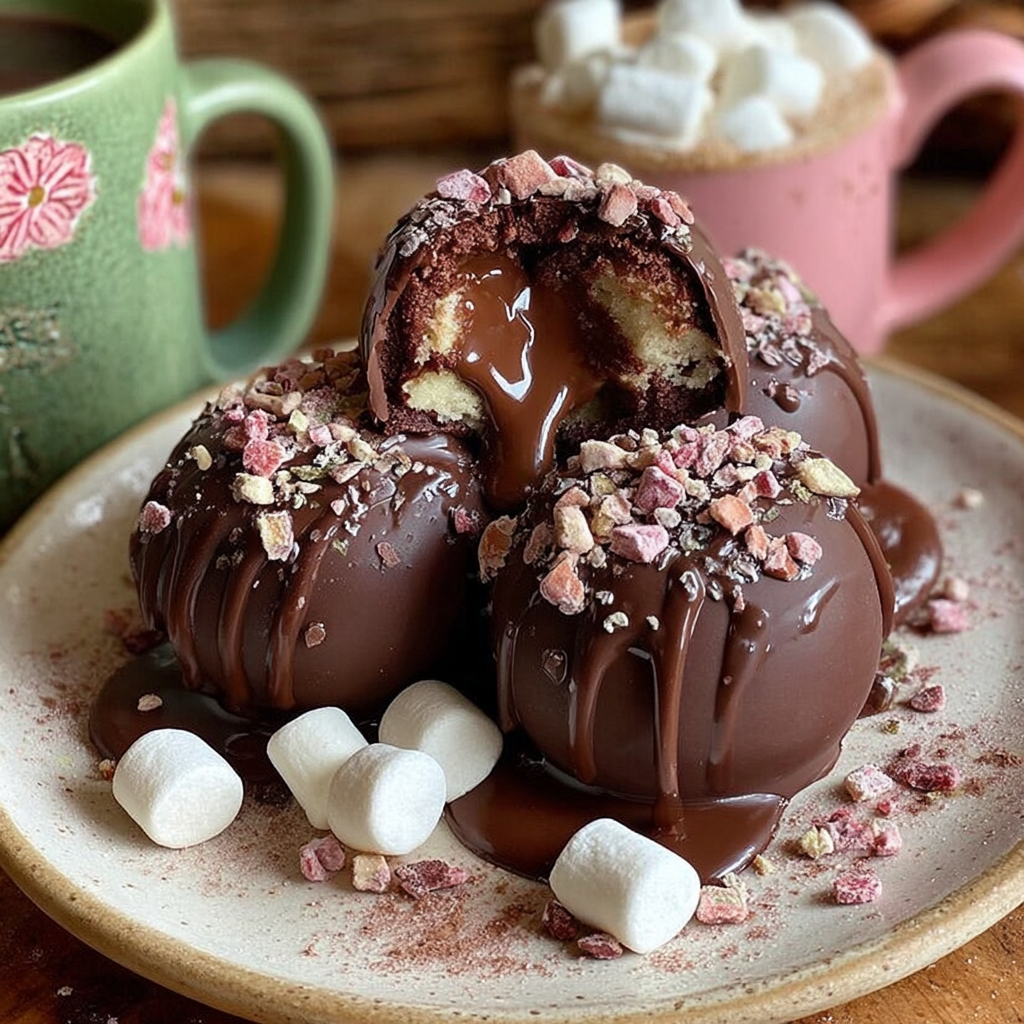
In the realm of cozy treats, homemade hot chocolate bombs stand as a delightful innovation. These spherical delights, composed of rich chocolate shells filled with cocoa and marshmallows, create a magic moment as they dissolve in steaming milk. It's like unwrapping a present, with every sip revealing layers of warmth and sweetness.
Not only are they a feast for the eyes, but they also invite playful interaction—perfect for gatherings or a quiet night in. With just a few ingredients and simple techniques, you can make these indulgent gifts yourself, transforming any cold day into an occasion worth celebrating.
Ingredients
- 1 cup high-quality chocolate (milk or dark)
Using a good quality chocolate is essential, as it dictates the flavor and smoothness of your hot chocolate bombs. Choose chocolate that melts easily for the best results. - 1/4 cup hot cocoa powder
Hot cocoa powder is the heart of the flavor in your bombs. Opt for a rich cocoa blend for a deeper chocolate taste; this ensures each bomb has a satisfying flavor punch. - 1/2 cup mini marshmallows
Mini marshmallows add a light, fluffy texture and a sweet touch when the bomb melts. Their playful appearance enhances both the presentation and the overall experience of your drink. - Silicone mold
A silicone mold is crucial for shaping the chocolate bombs. Choose a mold with the right size and shape for a balanced amount of chocolate and filling. A silicone mold also allows for easy release after cooling. - Optional: colored sprinkles or flavored extracts
Extras like sprinkles or flavored extracts (vanilla, peppermint) can personalize your bombs. They add visual appeal and unique flavors, making your hot chocolate experience truly individual.
Directions & Preparation
Step 1: Melt the chocolate in a microwave or double boiler.
Begin by finely chopping the chocolate into uniform pieces to ensure it melts evenly. Use medium heat if you choose the microwave, as chocolate can seize or burn easily. Stir the chocolate frequently to promote smooth melting—it should be completely melted and glossy before moving to the next step.
Step 2: Coat the silicone molds with melted chocolate.
Using a spoon or brush, carefully coat the inside of the silicone molds with melted chocolate, ensuring an even layer. Aim for about 2-3 millimeters in thickness. This step is key as a thicker shell will hold the ingredients inside and create a satisfying 'crack' when the bomb is added to hot milk.
Step 3: Chill the coated molds to set the chocolate.
Place the molds in the refrigerator for about 10-15 minutes until the chocolate hardens. This allows the coating to firm up, making it easier to remove from the molds. Avoid rushing this step; properly set chocolate will prevent tears or breaks when you demold.
Step 4: Fill half the chocolate shells with cocoa and marshmallows.
Once the chocolate has set, gently remove the shells from the mold. In each of half of the shells, add approximately a tablespoon of hot cocoa powder along with a tablespoon of mini marshmallows. This is where your flavor takes shape, so evenly distribute the ingredients for a balanced taste.
Step 5: Seal the bombs with a chocolate cap.
Take the remaining chocolate shells and gently melt the edges if necessary, then press them onto the filled halves to create a seamless ball. Make sure there's no filling escaping and that the edges have melted chocolate to adhere. This is crucial to ensure your bombs stay intact during storage and when served.
Step 6: Decorate the bombs as desired.
Feel free to add fun toppings like colored sprinkles or a drizzle of melted chocolate on top. This gives a personal touch and increases the visual appeal of your hot chocolate bombs. Aim for creativity here—it enhances not only how they look but also how fun they are to gift or serve.
Step 7: Store your bombs until ready to use.
Place your finished hot chocolate bombs in a cool, dry place, or in an airtight container in the refrigerator. Proper storage is essential to maintain freshness and to prevent unwanted melting or moisture, ensuring they remain delightful until it's time to enjoy them.

Creating the Perfect Chocolate Shell
The quality and melting method of the chocolate you choose significantly influence the outcome of your hot chocolate bombs. The chocolate shell not only holds the filling but also plays a crucial role in flavor and texture. Experiment with different types of chocolate, as the balance between milk and dark can yield distinct taste experiences. Always remember to temper chocolate carefully, ensuring a shiny finish that sets properly.
Customize Your Filling for Unique Flavors
The filling inside your chocolate bomb can be personalized to suit your taste preferences. While hot cocoa powder and marshmallows are classic choices, try incorporating flavored syrups, crushed candy canes during the holidays, or even a sprinkle of sea salt for a gourmet touch. The beauty of these bombs is their versatility—tailor the filling to create a unique sipping experience for yourself or as gifts.
Perfect Pairings: Milk Choices to Elevate Your Drink
The liquid you choose to pour over your hot chocolate bomb can transform the experience. Classic whole milk adds richness, while alternatives like almond or oat milk can provide a lighter or dairy-free option. Consider adding a splash of flavored milk (like peppermint or vanilla) for an unexpected twist. The pouring liquid plays an essential role in how the flavors meld and enhance each sip.
FAQs
Why did my chocolate shells break or crack?
Cracks can occur if the chocolate is too thin or if it was not tempered correctly. Ensure your chocolate is melted smoothly and evenly coats the mold.
What should I do if my hot chocolate bombs are too thick?
If the bombs are too thick, it may result from excessive chocolate in the shell or not enough filling. Aim for a balanced ratio to avoid overly dense bombs.
Can I use flavored hot cocoa mixes?
Absolutely! Using flavored mixes like white chocolate or caramel can add a unique twist to your bombs. Just ensure they complement your chosen chocolate.
How can I make my bombs less sweet?
To curb sweetness, use dark chocolate for the shell and opt for unsweetened cocoa powder in the filling. You can also adjust the amount of marshmallows.
What if my bombs don't dissolve properly in the milk?
If your bombs don't dissolve fully, it may be due to the milk temperature being too low. Ensure your milk is hot enough to activate the ingredients quickly.
Can I add spices to the cocoa mix?
Yes! Cinnamon, nutmeg, or chili powder can add warmth and depth to your cocoa mix. Just a dash can elevate the flavor profile beautifully.
Conclusion
Homemade hot chocolate bombs are not only a fun kitchen project but also a delightful way to brighten any chilly day. Whether enjoyed solo with a good book or shared at a gathering, these bombs bring joy and warmth with each creamy sip.
With a bit of creativity, the possibilities are endless—experiment with flavors and toppings for a personal touch. Embrace the joy of making these treats and watching your loved ones delight as they unveil the magic inside.
Recipe Card
Delightful Homemade Hot Chocolate Bombs for All Occasions
Ingredients
Method
- Melt the chocolate in a microwave or double boiler.
- Coat the silicone molds with melted chocolate.
- Chill the coated molds to set the chocolate.
- Fill half the chocolate shells with cocoa and marshmallows.
- Seal the bombs with a chocolate cap.
- Decorate the bombs as desired.
- Store your bombs until ready to use.
Notes
Additional serving suggestions: pair with a crisp salad, garlic bread, or roasted seasonal vegetables for balance.
For make-ahead, prep components separately and assemble just before heating to preserve texture.
Taste and adjust with acid (lemon/vinegar) and salt right at the end to wake up flavors.


