Introduction
As winter blankets the world in white, there’s a unique joy that comes from experiencing the outdoor chill. Snow brings with it a sense of purity and simplicity, inviting playful activities or cozy moments by the fire. One delightful way to enjoy fresh powdery snow is through the creation of snow ice cream, a nostalgic treat that harkens back to simpler times.
Homemade snow ice cream is an easy, fun recipe that requires just a few basic ingredients, transforming pristine snow into a creamy dessert. With its sweet flavor and fluffy texture, this treat dances on your taste buds and creates memorable moments with family and friends. Best of all, making snow ice cream is not only entertaining, it also brings that magical winter wonderland straight to your kitchen.
Ingredients
- 8 cups fresh, clean snow
Using fluffy, untouched snow makes for the best texture in your ice cream. It ensures a light and airy consistency, allowing the mixture to be both refreshing and fun to eat. Avoid snow that is packed down or contaminated. - 1 cup milk
Milk adds creaminess and richness to your snow ice cream. It helps create a smooth and velvety texture, balancing the lightness of the snow while also contributing to the overall flavor. - 1/2 cup granulated sugar
Sugar is essential for sweetness, which enhances the flavor of the ice cream. It also helps create a soft texture, making the final product delightful to scoop and eat. - 1 teaspoon vanilla extract
Vanilla extract adds a warm, aromatic flavor, elevating the overall taste of the snow ice cream. It complements the sweetness of sugar beautifully and helps to round out the flavor profile.
Directions & Preparation
Step 1: Gather fresh snow in a large bowl or container.
Selecting the right snow is crucial for making homemade snow ice cream. Aim for about 8 cups of light, fluffy snow that is clean and free from contaminants. This ensures a delicious and safe treat, setting the foundation for your ice cream's texture.
Step 2: In a separate bowl, combine milk, sugar, and vanilla extract.
Mixing the milk, sugar, and vanilla extract together creates a uniform liquid base for your snow ice cream. The sugar must dissolve into the milk, ensuring even sweetness that permeates the snow once combined. Use whisking or stirring to create a smooth mixture.
Step 3: Pour the milk mixture over the snow gradually.
Adding the milk mixture gradually allows the snow to absorb the liquid properly, preventing clumping. Stir gently with a spatula or spoon, allowing the snow to blend with the liquid until you achieve a creamy consistency. This step is vital for achieving the ideal mouthfeel.
Step 4: Adjust sweetness and consistency as needed.
Taste your snow ice cream and determine if you’d like to add more sugar for sweetness or additional snow to adjust the texture. The balance is key: you want a sweet, creamy ice cream that isn’t too dense. Consider the flavors and adjust to your liking before serving.
Step 5: Serve immediately or place it in the freezer to firm up.
Snow ice cream is best enjoyed fresh, and serving it immediately allows for the most delightful textures. However, if you prefer a firmer consistency, you can place it in the freezer for a short period. Just be aware that it may harden considerably if left too long, affecting its fluffiness.

Exploring Flavor Variations
While the classic vanilla snow ice cream is delicious, consider adding variations to suit your taste. Try incorporating cocoa powder for a chocolate twist or mix in fruit purees for a natural sweetness and colorful swirls. Play with extracts such as almond or coconut to elevate your creation even further, making it uniquely yours.
Perfecting Texture and Consistency
Achieving the right texture is essential for homemade snow ice cream. If the mixture appears too runny, gradually fold in more snow to absorb excess liquid. On the other hand, if it’s too thick, add a little more milk until you reach that perfect creamy balance. The visual cues in texture will enhance your final dish significantly, making it appetizing.
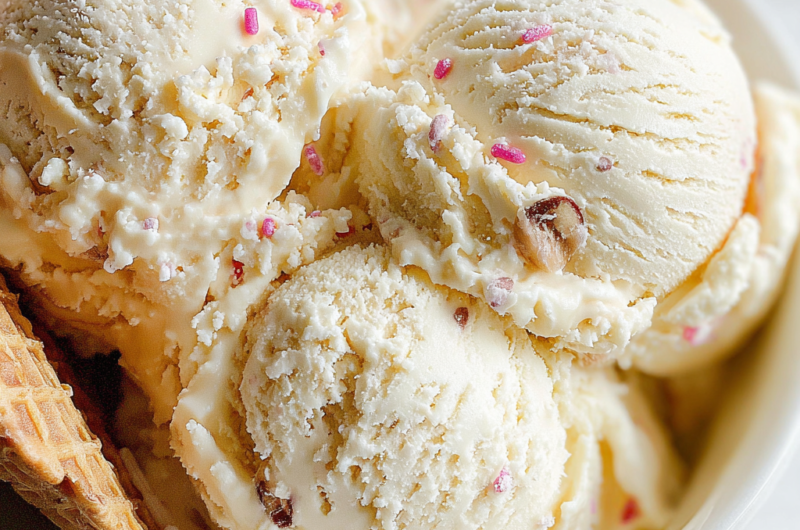
Creative Toppings to Enhance Enjoyment
Once your snow ice cream is ready, the fun isn’t over yet! Offer a variety of toppings such as sprinkles, crushed cookies, or fresh fruits to make serving more exciting. Drizzling chocolate syrup or caramel adds a touch of indulgence while enhancing flavor and visual appeal, making each scoop a delightful surprise.
FAQs
What should I do if my snow ice cream is too runny?
If your mixture is too runny, gradually fold in more fresh snow until you reach the desired consistency.
Can I replace the milk with a non-dairy alternative?
Yes, non-dairy alternatives like almond milk or coconut milk work well, but they may alter the flavor slightly.
How can I enhance the flavor of my snow ice cream?
You can enhance the flavor by adding more vanilla extract, fruit purees, or a dash of cocoa powder for a chocolatey version.
What’s the best type of snow to use?
Light, fluffy, and clean snow is ideal for making snow ice cream, as it provides the best texture.
Can I use flavored syrups in my snow ice cream?
Absolutely! Flavored syrups, such as strawberry or caramel, can add a fun twist to the classic recipe.
My mixture tastes bland; how can I adjust it?
If your snow ice cream tastes bland, try adding a little more sugar or vanilla extract to enhance the overall flavor.
Conclusion
Homemade snow ice cream provides a delicious and creative way to celebrate the beauty of winter. With its simple ingredients and joyful preparation, this treat is perfect for all ages. Share the experience with loved ones as you make and munch on this delightful creation.
So, the next time you find yourself in a winter wonderland, remember you have the perfect opportunity to indulge in a nostalgic dessert that’s as much about the experience as it is about the taste. Enjoy the magic of the season—one scoop at a time.
Recipe Card

Delight in Homemade Snow Ice Cream Today
Ingredients
Method
- Gather fresh snow in a large bowl or container.
- In a separate bowl, combine milk, sugar, and vanilla extract.
- Pour the milk mixture over the snow gradually.
- Adjust sweetness and consistency as needed.
- Serve immediately or place it in the freezer to firm up.
Notes
Additional serving suggestions: pair with a crisp salad, garlic bread, or roasted seasonal vegetables for balance.
For make-ahead, prep components separately and assemble just before heating to preserve texture.
Taste and adjust with acid (lemon/vinegar) and salt right at the end to wake up flavors.


