Introduction
There's something uniquely delightful about combining sponge cake with luscious flavors, and when you add Biscoff and cream into the mix, the results are absolutely irresistible. This cake offers a perfect balance of lightness from the sponge and richness from the cream, heightened by the distinct caramelized notes of Biscoff spread.
Whether you're baking for a special occasion or just as a treat for yourself, this recipe is approachable for home cooks of all levels. With a few simple ingredients and a bit of care, you can create a dessert that impresses and satisfies everyone at your table. Let's dive into the delightful world of Biscoff cream sponge cake!
Ingredients
- 4 large eggs
Eggs provide structure and stability to the sponge cake. They also add moisture and richness, contributing to the cake's overall flavor and texture. - 120g granulated sugar
Sugar not only sweetens the cake but also helps create a light, airy texture by incorporating air into the batter during mixing. It also contributes to the browning of the cake. - 120g all-purpose flour
Flour forms the base of the cake. It provides structure, while the right amount of gluten formed during mixing leads to a tender crumb. - 1 tsp baking powder
Baking powder is a leavening agent that helps the cake rise. It creates air bubbles in the batter, resulting in a fluffy and light sponge. - 60g unsalted butter, melted
Butter adds flavor and richness to the cake, while also helping to keep it moist. The melted butter ensures even mixing for a smoother batter. - 1 tsp vanilla extract
Vanilla enhances the overall flavor of the cake, providing a warm aroma that complements the sweetness of the sponge. - 250g Biscoff spread (plus extra for layering)
The Biscoff spread infuses the cake with its signature caramel and spice flavors, creating a unique twist that elevates the traditional sponge. - 250ml heavy cream
Heavy cream is whipped to create a light and airy filling that contrasts beautifully with the dense sponge and adds a luscious texture. - 2 tbsp powdered sugar
Powdered sugar sweetens the whipped cream without making it too coarse and provides a light texture that blends well with the cream.
Directions & Preparation
Step 1: Preheat your oven to 180°C (350°F). Grease and line two 8-inch round cake pans.
Preheating the oven is essential for even baking. By lining the pans with parchment paper, you ensure easy removal of the cakes once baked, preventing any potential damage to their delicate structure.
Step 2: In a mixing bowl, whisk together the eggs and granulated sugar until pale and fluffy.
Whisking eggs and sugar incorporates air, which is crucial for a light sponge. The mixture should double in volume and become a pale yellow color, which indicates it is adequately aerated.
Step 3: Sift in the flour and baking powder, then gently fold into the egg mixture.
Sifting the flour helps prevent lumps and ensures an even distribution of the leavening agent. Folding gently preserves the air you incorporated earlier, maintaining the sponge's lightness.
Step 4: Add the melted butter and vanilla extract, folding gently until just combined.
Adding melted butter adds richness to the batter. Be careful not to overmix – you want just enough to incorporate the butter without losing the airiness of the sponge.
Step 5: Divide the batter evenly between the prepared cake pans and smooth the tops.
Even division of batter helps the cakes rise uniformly, ensuring they bake evenly. Smooth tops allow them to bake into a flat shape, making stacking easier.
Step 6: Bake for 25-30 minutes, or until the tops are golden and a toothpick inserted comes out clean.
Watching the color change is key to knowing when they’re done. Overbaking can dry out the cake, so check for doneness a few minutes before you think they might be ready.
Step 7: Let the cakes cool in the pans for 10 minutes before transferring to wire racks to cool completely.
Cooling in the pans allows the cakes to set slightly, making them easier to handle. Transferring them to wire racks ensures they cool evenly on all sides, preventing sogginess.
Step 8: Once cooled, whisk the heavy cream with powdered sugar until soft peaks form.
Beating the cream until soft peaks form gives it the perfect texture for spreading. Over-whipping can lead to butter formation, so watch closely as you whip.
Step 9: Spread a layer of Biscoff spread on top of one cake layer, then top with half of the whipped cream.
Layering the Biscoff spread adds flavor and moisture to the cake. Adding whipped cream next creates a fluffy contrast and helps bind the layers together.
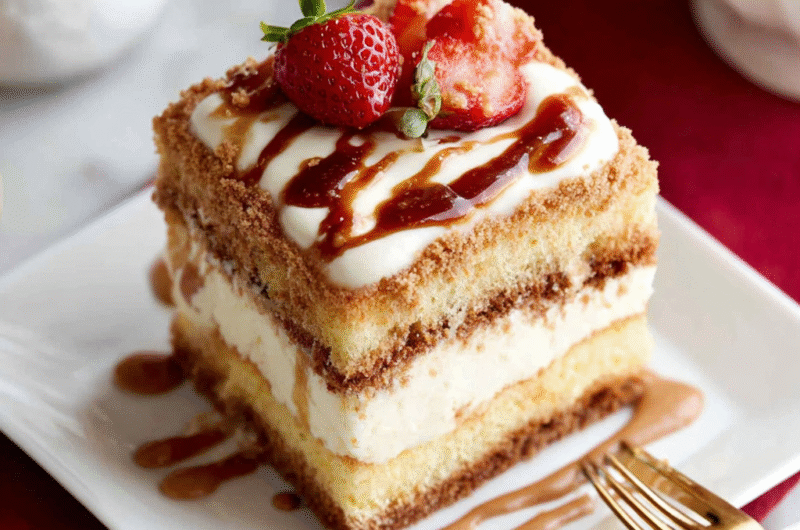
Step 10: Place the second cake layer on top, then spread the remaining Biscoff on top and the rest of the cream to finish.
This final layer of Biscoff sets the stage for a deliciously sweet top that encourages a decadent experience. The cream creates a visually appealing finish as well.
Step 11: Chill the cake in the fridge for at least 30 minutes before slicing and serving.
Chilling the cake allows the flavors to meld together beautifully and helps the cream firm up, making for a neater presentation when slicing.

The Magic of Biscoff Spread
Biscoff spread transforms this simple sponge into a flavor-packed experience. Made from crushed speculoos cookies, it adds layers of caramel and spice that contrast with the light sponge. This unique ingredient not only elevates the taste but also makes it visually appealing, creating a dessert that stands out on any dessert table.
Perfecting the Sponge Texture
Achieving the ideal sponge texture requires care during mixing and baking. The incorporation of air during whisking is essential for leavening, resulting in a cake that is soft and airy. Monitoring baking times closely will prevent structural collapse and ensure a beautifully risen sponge that provides the perfect base for the creamy layers.
Cream Whipping Tips You Should Know
Whipping cream is an art form that requires attention and technique. Start with chilled utensils and cream for optimal volume. Gradually increase speed to achieve soft peaks without overbeating. The texture should hold up yet remain spreadable, striking a balance between stable and light, creating that fluffy filling you dream of in a perfect sponge cake.
FAQs
What if my sponge cake doesn't rise properly?
Ensure your baking powder is fresh and that you properly incorporated air into the egg and sugar mixture. Overmixing the batter can also prevent it from rising.
Why is my whipped cream too runny?
This usually happens if the cream wasn’t whipped long enough or if it was too warm. Make sure your cream is cold and whisk until it reaches stiff peaks.
Can I use a different flavor of spread?
Absolutely! While Biscoff is unique, other cookie spreads such as Nutella or any flavored cream cheese can work well, though they will alter the overall flavor.
What should I do if my sponge cake is too dense?
If your sponge is dense, it may be due to overmixing or not aerating the eggs enough. Mixing gently and ensuring the right folding technique is essential for a light cake.
How can I ensure my layers are even when stacked?
Using a cake leveler or serrated knife to trim the tops of the cakes can help create an even surface. This allows for a stable, tiered construction.
What if the Biscoff spread is too thick to spread easily?
Warming the Biscoff spread slightly in the microwave for a few seconds can make it easier to spread. Just ensure it doesn’t become too hot.
Conclusion
This Biscoff cream sponge cake is not just a dessert; it's an experience of flavors and textures that evokes delight in every bite. The soft sponge paired with the rich Biscoff and light cream creates a memorable treat for any occasion.
With a bit of practice and patience, this cake can become a staple in your baking repertoire, ready to impress family and friends. Embrace the joy of baking and enjoy sharing slices of this delightful creation!
Recipe Card

Delicious Biscoff Cream Sponge Cake Recipe
Ingredients
Method
- Preheat your oven to 180°C (350°F). Grease and line two 8-inch round cake pans.
- In a mixing bowl, whisk together the eggs and granulated sugar until pale and fluffy.
- Sift in the flour and baking powder, then gently fold into the egg mixture.
- Add the melted butter and vanilla extract, folding gently until just combined.
- Divide the batter evenly between the prepared cake pans and smooth the tops.
- Bake for 25-30 minutes, or until the tops are golden and a toothpick inserted comes out clean.
- Let the cakes cool in the pans for 10 minutes before transferring to wire racks to cool completely.
- Once cooled, whisk the heavy cream with powdered sugar until soft peaks form.
- Spread a layer of Biscoff spread on top of one cake layer, then top with half of the whipped cream.
- Place the second cake layer on top, then spread the remaining Biscoff on top and the rest of the cream to finish.
- Chill the cake in the fridge for at least 30 minutes before slicing and serving.
Notes
Additional serving suggestions: pair with a crisp salad, garlic bread, or roasted seasonal vegetables for balance.
For make-ahead, prep components separately and assemble just before heating to preserve texture.
Taste and adjust with acid (lemon/vinegar) and salt right at the end to wake up flavors.


