Introduction
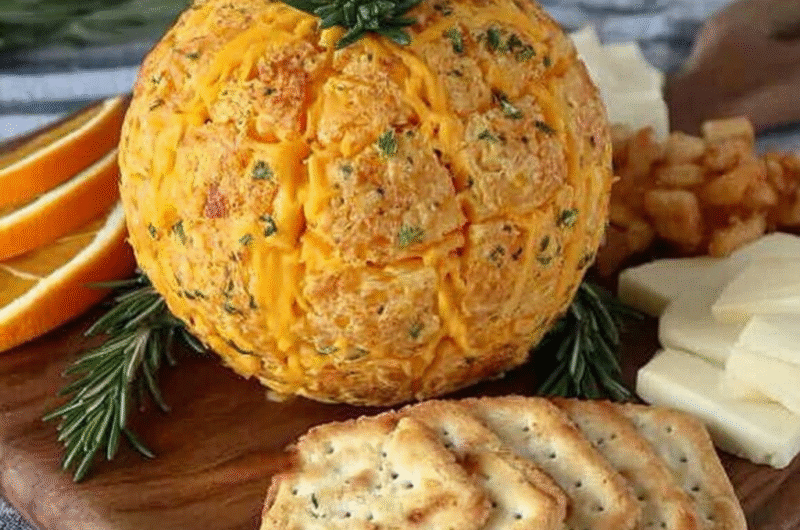
Cheese balls have long been a staple at festive gatherings, bridging the gap between elegant hors d'oeuvres and casual snacking. They offer a delightful blend of flavors and textures, making them perfect for sharing. The adorable shape and creamy texture can be customized to suit any palate—or simply to impress your guests.
Whether you're hosting a cozy gathering or a lively party, making a cheese ball is an effortless way to bring warmth and flavor to your table. With a handful of ingredients and minimal effort, you can create a show-stopper that encourages socializing and conversation.
This cheese ball not only tastes amazing but also invites creativity in presentation and flavor combinations. Let’s dive into crafting an adorable cheese ball that will become an instant crowd favorite.
Ingredients
- 8 oz cream cheese, softened
Cream cheese serves as the base of the cheese ball, providing a creamy texture and mild flavor. It binds the other ingredients together while also making the cheese ball easy to spread. - 1 cup shredded sharp cheddar cheese
Sharp cheddar adds a robust flavor that pairs wonderfully with the cream cheese, imparting depth and a savory bite that balances the dish. - 1/2 cup crumbled blue cheese
Blue cheese introduces tang and a bit of saltiness, enriching the flavor profile and giving the cheese ball a distinct character. - 1/3 cup chopped green onions
Green onions contribute a fresh, crisp flavor that complements the creaminess of the cheese without overwhelming it, providing a nice contrast. - 1/2 cup chopped walnuts, pecans, or almonds
Nuts add crunch and a toasted flavor that enhances the overall experience of the cheese ball, giving it a hearty texture. - 1 tablespoon Worcestershire sauce
This sauce infuses umami and ties the flavors together, adding a complex layer that elevates the entire cheese ball. - Salt and pepper to taste
Seasoning is crucial in balancing flavors; a pinch of salt heightens sweetness while pepper adds a touch of warmth. - Fresh herbs like parsley or dill (optional)
These herbs can brighten the flavors and add a pop of color to the presentation, making the cheese ball even more appealing.
Directions & Preparation
Step 1: Prepare the cheese mixture
Start by ensuring your cream cheese is adequately softened, as this will make mixing much easier. In a medium bowl, combine the cream cheese, sharp cheddar, blue cheese, Worcestershire sauce, and seasoning. Use a fork or an electric mixer to blend until smooth. The texture should be creamy with the cheeses well incorporated. This initial mixing sets the foundation for a well-flavored cheese ball.
Step 2: Incorporate the green onions and nuts
Add the chopped green onions and your choice of nuts to the cream cheese mixture. Use a spatula or wooden spoon to fold these ingredients in gently. This step is vital as it introduces crunch and a fresh element to the cheese ball, and you'll want to ensure these are evenly distributed throughout.
Step 3: Shape the mixture into a ball
Once all ingredients are mixed, transfer the mixture onto a piece of plastic wrap. Use the wrap to shape the mixture into a ball, ensuring it is compact. The shaping process not only makes it visually appealing but also helps maintain its form when serving. A well-rounded ball holds together better for slicing.
Step 4: Wrap and chill
After forming the ball, wrap it tightly in the plastic wrap and refrigerate for at least 2-4 hours, or overnight if possible. Chilling allows the flavors to meld and solidifies the cheese ball’s structure. This resting period is key to enhancing flavor.
Step 5: Prepare for coating
Before serving, remove the cheese ball from the refrigerator, unwrap it, and prepare a coating mix with nuts or herbs if desired. Roll the cheese ball in the mixture until well coated. This final touch adds texture and visual appeal, making it irresistible.
Step 6: Serve it up
Transfer the cheese ball to a serving platter, adding crackers, vegetables, or fruits around it for dipping. The presentation enhances the overall experience, inviting guests to dig in and enjoy. This assembly is as much about aesthetics as it is about flavor.

Flavor Variations to Explore
While the classic blend of cream cheese and cheddar is delightful, there are countless variations to explore. Try incorporating sun-dried tomatoes for a Mediterranean twist or smoked Gouda for a touch of earthiness. A dash of hot sauce can add a spicy kick, making each bite a little adventure. These variations allow you to tailor the cheese ball to your guests' tastes.
Presentation Tips for an Eye-Catching Cheese Ball
Presentation can elevate your cheese ball from simple to stunning. Consider using a round wooden board or slate to showcase the cheese ball. Adding herbs or edible flowers can enhance its charm. You might also create a festive atmosphere by surrounding the cheese ball with seasonal fruits or colorful vegetable sticks, inviting everyone to partake.
Pairing Suggestions to Complement Flavors
When serving your cheese ball, consider pairing it with an assortment of crackers, sliced baguette, or fresh veggies. A selection of pickles or olives can add a tangy contrast. For drinks, white wines or light beers complement the rich flavors, while a fruity cider can add a refreshing counterpoint. These pairings enrich the experience.
FAQs
What if my cheese ball doesn’t hold its shape?
If your cheese ball is too soft and doesn’t hold shape, it’s likely due to not chilling it long enough. Ensure you chill it for at least 2-4 hours, or even overnight, to firm up.
Can I use flavored cream cheese in this recipe?
Absolutely! Flavored cream cheeses can add an additional layer of taste. However, adjust the other ingredients to maintain the overall balance of flavors.
How can I prevent my cheese ball from being too salty?
If you’re concerned about saltiness, particularly with blue cheese, be cautious with added salts and taste as you mix. Using low-sodium cheese options can also help.
What if I want a milder flavor profile?
Opt for milder cheeses, like Monterey Jack or mozzarella, and skip the blue cheese. You can also decrease the amount of Worcestershire sauce to control the flavor intensity.
Can I add extras like dried fruits to my cheese ball?
Dried fruits like cranberries or apricots can add sweetness and chewiness. Just be sure to balance the flavors by adjusting other ingredients accordingly.
What materials work best for serving the cheese ball?
To serve your cheese ball, a wooden board or slate adds a rustic touch. Pair with an array of serving options, like crackers or bread, on the same platter for an inviting display.
Conclusion
Creating an adorable cheese ball is not only about the delicious flavors but also about the joy it brings to gatherings. Its versatility allows for endless creativity, making it a fun project to take on in the kitchen.
With simple ingredients and preparation, anyone can craft a cheese ball that pleases both taste buds and eyes. So gather your ingredients and start mixing; your next gathering will be a hit with this charming addition.
Recipe Card
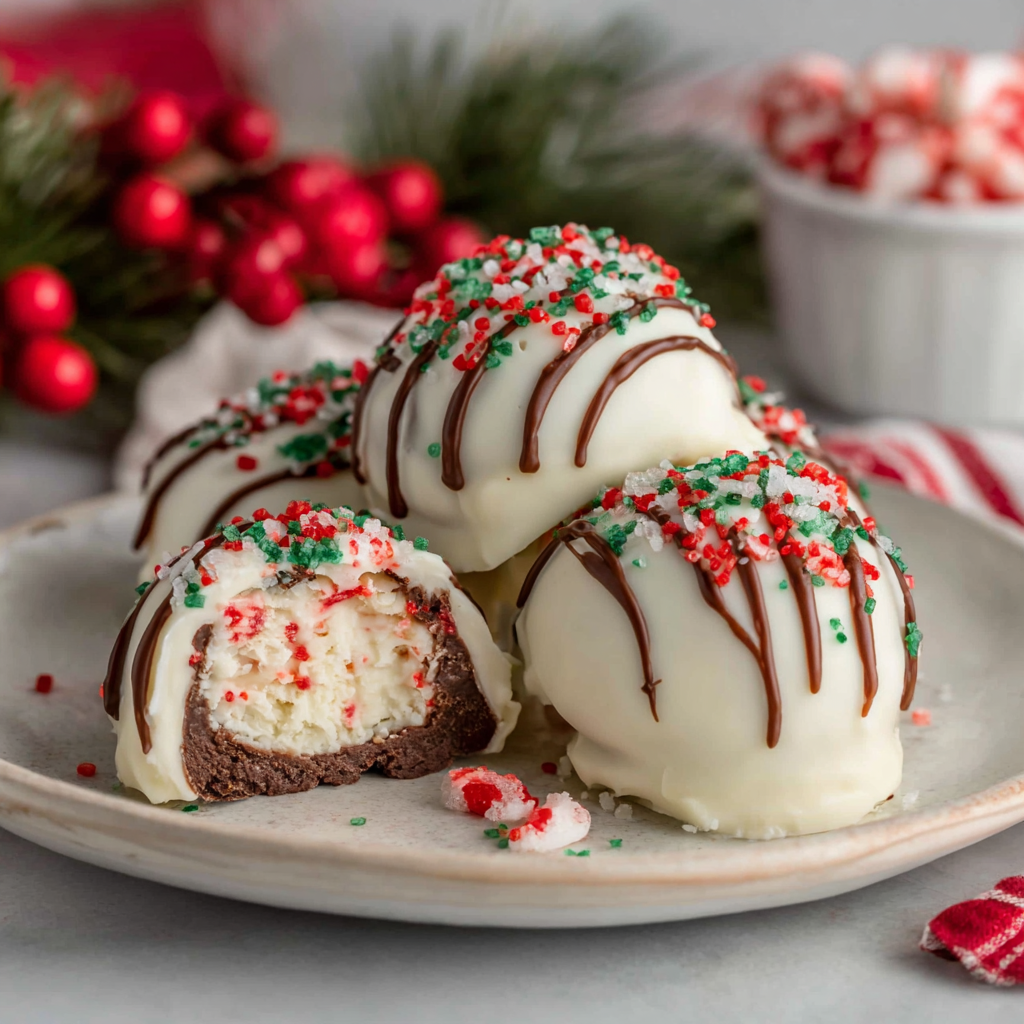
Delicious Truffles Inspired by Christmas Tree Cakes
Ingredients
Method
- Prepare the truffle mixture by crumbling the Little Debbie cakes into a large bowl.
- Add softened cream cheese to the crumbled cakes and mix until combined.
- Chill the mixture in the refrigerator for about 30 minutes.
- Scoop out portions of the mixture and roll them into balls.
- Melt the white chocolate chips with coconut oil until smooth.
- Dip each truffle into the melted white chocolate and allow excess to drip off.
- Decorate with sprinkles before the chocolate hardens.
- Let the truffles set in the refrigerator for about 20 minutes.
Notes
Additional serving suggestions: pair with a crisp salad, garlic bread, or roasted seasonal vegetables for balance.
For make-ahead, prep components separately and assemble just before heating to preserve texture.
Taste and adjust with acid (lemon/vinegar) and salt right at the end to wake up flavors.


