
Introduction
Turning a classic dessert into something remarkably chic, pink velvet cake offers a unique twist on the traditional red velvet. With its gentle hue and velvety texture, this cake is perfect for special occasions and celebrations. It's not just about the color; this cake is infused with delightful flavors that make every bite irresistible.
The beauty of pink velvet cake lies not only in its appearance but also in its rich, buttery taste that is reminiscent of a traditional velvet cake. Combining the tenderness of a well-crafted cake with a striking color can elevate any dessert table. Let’s explore how to create this stunning treat with the right ingredients and techniques.
Ingredients
- 2 ½ cups all-purpose flour
The base of the cake, providing structure and stability while keeping the texture light and airy. The gluten developed when mixing will provide the necessary rise. - 1 ½ cups granulated sugar
This sweetener not only adds sweetness but also contributes to the cake's moisture. Sugar helps to create a tender crumb and aids in achieving the desired velvety texture. - 1 cup unsalted butter, softened
Butter adds flavor and richness, creating that characteristic moist texture. Its fat content also aids in leavening through aeration when creamed with sugar. - 1 cup buttermilk
Buttermilk provides acidity, which interacts with the baking soda to create leavening. It also adds a subtle tang, enhancing the overall flavor of the cake. - 3 large eggs
Eggs bind the ingredients together and contribute moisture. The proteins in eggs also help the cake set as it bakes, resulting in a firm yet tender texture. - 2 tablespoons cocoa powder
While only a small amount, cocoa powder darkens the cake slightly and adds depth to the flavor profile without overwhelming the main notes. - 1 teaspoon baking soda
This leavening agent, when combined with the acidic buttermilk, creates carbon dioxide bubbles that help the cake rise and become fluffy. - 1 teaspoon vanilla extract
Vanilla enhances the cake's flavor profile, adding a warm aroma that complements the buttery sweetness. - 1 tablespoon red food coloring
Incorporating food coloring brings the signature pink hue to the cake, effectively transforming a classic into a visually appealing creation.
Directions & Preparation
Step 1: Preheat your oven to 350°F (175°C) and prepare your baking pans.
Preheating the oven is vital to ensure that the cake bakes evenly. Proper temperature aids in achieving the desired rise and sets the texture just right. Greasing and lining the pans prevents sticking, making it easier to remove the cakes once baked.
Step 2: In a large mixing bowl, cream together the softened butter and granulated sugar until light and fluffy.
Creaming the butter and sugar introduces air into the mixture, which is crucial for a lofty cake. The fluffy texture is achieved through this aeration, and it ensures that your cake has a light and tender crumb.
Step 3: Add the eggs, one at a time, mixing well after each addition.
Incorporating the eggs gradually allows for better emulsification, giving the batter stability and moisture. Each egg adds protein, contributing to structure while keeping the cake tender.
Step 4: Mix in the buttermilk and vanilla extract until combined.
These wet ingredients not only flavor the cake but also create a perfect balance, essential for a moist mouthfeel. The acidity of buttermilk helps in activating the baking soda, ensuring proper leavening as it bakes.
Step 5: In a separate bowl, whisk together the flour, cocoa powder, and baking soda.
This step ensures that the dry ingredients are evenly distributed, preventing any clumps of cocoa or baking soda in the final batter. It also helps to keep the cake texture even and smooth.
Step 6: Gradually add the dry mixture to the wet ingredients, mixing until just combined.
Overmixing can develop the gluten too much, resulting in a dense cake. By mixing just until combined, you ensure the best texture while still achieving the necessary incorporation.
Step 7: Stir in the red food coloring until you achieve the desired pink hue.
Adding coloring at this point allows for a thorough mix, ensuring an even color throughout the batter. Adjusting the quantity can give you varying shades of pink, letting you customize your cake.
Step 8: Divide the batter evenly between the prepared pans and smooth the tops.
Even distribution of batter ensures uniform baking times and cake sizes. Smoothing the tops helps in creating a flat cake surface, which is essential for stacking and frosting.
Step 9: Bake in the preheated oven for 25-30 minutes, or until a toothpick inserted in the center comes out clean.
Monitoring the baking time is crucial; overbaking can dry out the cake while underbaking can lead to a soggy center. Toothpick testing is a reliable method to check for doneness.
Step 10: Allow the cakes to cool in the pans for 10 minutes, then transfer to wire racks to cool completely before frosting.
Cooling the cakes in the pans initially helps them firm up and reduces the risk of breaking. Once cool, transferring to a wire rack allows air to circulate, preventing sogginess and ensuring a perfect crumb.

Choosing the Right Food Coloring
When selecting food coloring for your pink velvet cake, opt for gel-based products over liquid variants. Gel colors provide more vibrant and consistent results with less liquid interference, maintaining the batter's consistency. Experimenting with different shades allows for customization; just remember that the color will lighten slightly during baking.
Frosting Pairings: Cream Cheese vs. Buttercream
The choice of frosting can dramatically alter the overall flavor and presentation of your pink velvet cake. A classic cream cheese frosting complements the buttery richness of the cake, lending it a tangy flavor that balances sweetness. Alternatively, a traditional buttercream provides a sweet, smooth texture that's perfect for those preferring a more straightforward sweetness.
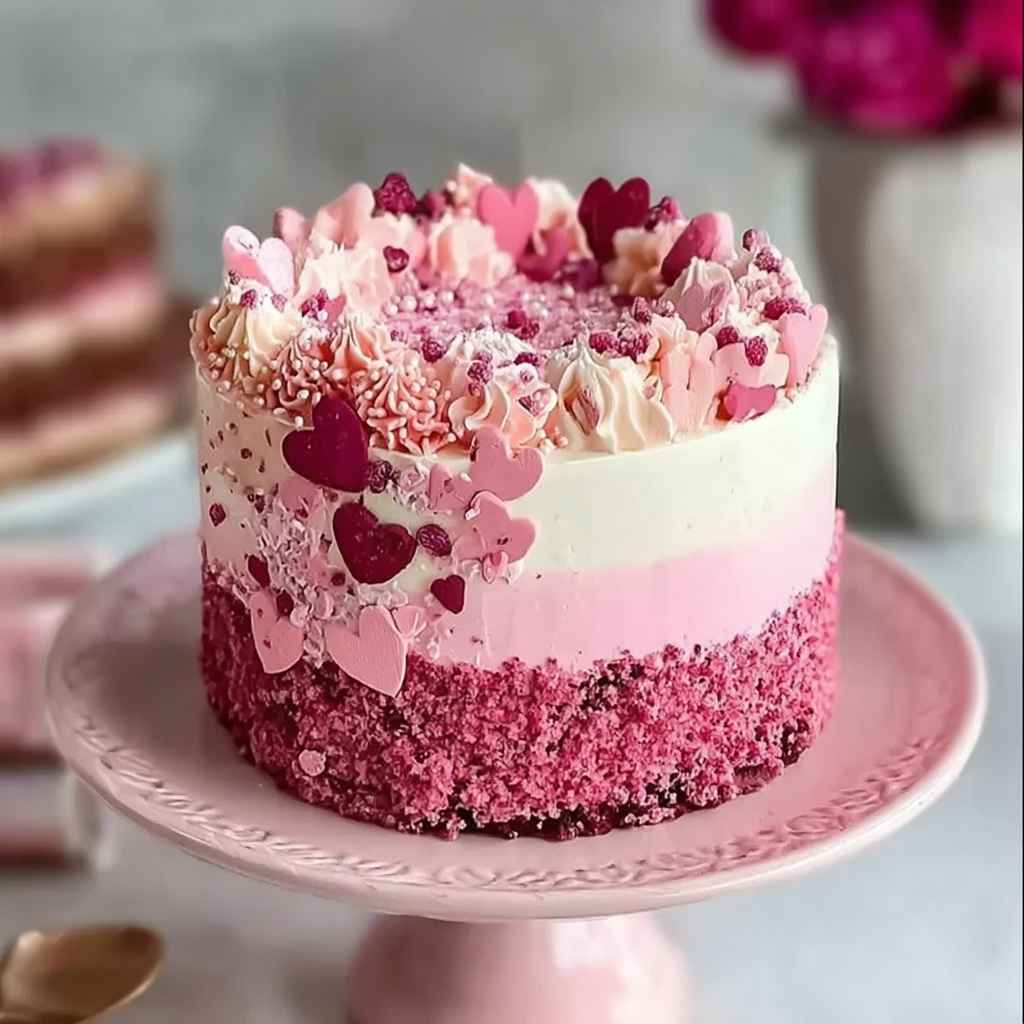
Decorative Ideas for Presentation
Consider embellishing your pink velvet cake with fresh flowers, edible glitter, or fruit garnishes for an aesthetically pleasing display. A simple dusting of powdered sugar can add elegance, whereas fruit purees can enhance flavor while making the dessert visually striking. Personalization through decorations can turn your cake into a memorable centerpiece.
FAQs
What texture should I expect from the pink velvet cake?
The cake should be light, moist, and tender, with a velvety crumb that melts in your mouth.
Can I reduce the sugar for a less sweet cake?
Yes, you can slightly reduce the sugar, but remember that it also contributes to moisture and texture. Reducing it too much may affect these qualities.
What if my cake is too thick after mixing?
If the batter appears too thick, gradually add a little additional buttermilk to reach the desired consistency. Be cautious not to overmix.
Is it necessary to use cocoa powder in the recipe?
While it gives a slight depth of flavor, you can omit it for a more classic velvet flavor, adjusting the liquid slightly to maintain batter consistency.
How can I know if the cake is fully baked?
A toothpick inserted in the center should come out clean or with a few moist crumbs, indicating that the cake is baked through.
What type of frosting works best with this cake?
Both cream cheese frosting and buttercream are excellent choices, each providing a unique flavor profile that complements the cake.
Can I make this cake as cupcakes instead?
Absolutely! Divide the batter into cupcake liners and bake for about 20 minutes. This makes portion control easier and offers a delightful presentation.
Conclusion
Crafting a pink velvet cake is not just about baking; it’s about infusing creativity and personal touch into a classic recipe. With its rich taste and stunning color, this cake is sure to impress at any gathering.
Whether you choose to frost it simply or decorate extravagantly, the process is as rewarding as the outcome. Enjoy the baking journey and the lovely moments shared over this delightfully unique dessert.
Recipe Card
Creating a Beautiful Pink Velvet Cake at Home
Ingredients
Method
- Preheat your oven to 350°F (175°C) and prepare your baking pans.
- In a large mixing bowl, cream together the softened butter and granulated sugar until light and fluffy.
- Add the eggs, one at a time, mixing well after each addition.
- Mix in the buttermilk and vanilla extract until combined.
- In a separate bowl, whisk together the flour, cocoa powder, and baking soda.
- Gradually add the dry mixture to the wet ingredients, mixing until just combined.
- Stir in the red food coloring until you achieve the desired pink hue.
- Divide the batter evenly between the prepared pans and smooth the tops.
- Bake in the preheated oven for 25-30 minutes, or until a toothpick inserted in the center comes out clean.
- Allow the cakes to cool in the pans for 10 minutes, then transfer to wire racks to cool completely before frosting.
Notes
Additional serving suggestions: pair with a crisp salad, garlic bread, or roasted seasonal vegetables for balance.
For make-ahead, prep components separately and assemble just before heating to preserve texture.
Taste and adjust with acid (lemon/vinegar) and salt right at the end to wake up flavors.


