Introduction
The allure of a New York style bagel stretches far beyond its chewy exterior and dense interior. Whether enjoyed plain or topped with cream cheese and lox, the charm lies in its unique preparation method. Bringing a taste of this iconic delicacy into your kitchen is a rewarding experience that invokes the time-honored methods of skilled bagel-makers.
At the heart of a great bagel is its boiling process, which gives it the signature texture. Each ingredient plays a crucial role in achieving the perfect balance of flavor and chewiness. With a little patience and the right techniques, you can recreate that New York bakery experience right at home.
Ingredients
- 4 cups bread flour
Bread flour's higher protein content creates a denser dough, providing the chewy texture essential for authentic bagels. It can trap more air during fermentation, resulting in a better rise. - 1 tbsp sugar
Sugar contributes to the browning of the bagels during baking and enhances the flavor. It also helps to feed the yeast, promoting proper fermentation. - 1 tbsp salt
Salt is critical for flavor and strengthening the dough. It helps control the fermentation process by regulating yeast activity, leading to a well-developed structure. - 2 ¼ tsp active dry yeast
Yeast is the leavening agent that gives bagels their rise. It ferments the sugars in the dough, producing carbon dioxide, which causes the bagels to puff up. - 1 ½ cups warm water (110°F)
Warm water activates the yeast, enabling it to ferment properly. The right temperature is crucial; too hot can kill the yeast, while too cold will not activate it effectively. - 1 tbsp baking soda (for boiling water)
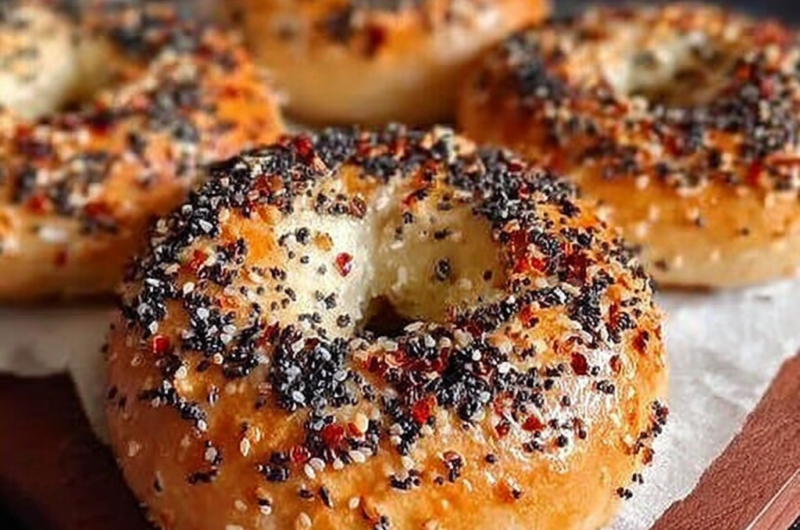
Baking soda in the boiling water increases the alkalinity, promoting a shiny crust and enhancing the bagels' golden-brown color. - Toppings (like sesame seeds or poppy seeds)
These add flavor and texture to the bagels. While classic bagels often feature these toppings, the choice is yours to customize based on your preferences.
Directions & Preparation
Step 1: Combine warm water and sugar, then add yeast.
Start by activating the yeast in warm water mixed with sugar. This step is crucial, as the sugar feeds the yeast, allowing it to bubble and grow. Wait about 5-10 minutes until the mixture becomes frothy, indicating that the yeast is alive and ready to work.
Step 2: Mix in flour and salt, then knead the dough.
Once the yeast mixture is bubbly, add the flour and salt. Combine until a shaggy dough forms, then transfer it to a floured surface. Kneading helps develop gluten, which gives the dough its structure. Aim for about 10 minutes of kneading until the dough is smooth and elastic.
Step 3: Let the dough rise for 1 hour before shaping.
After kneading, place the dough in a lightly oiled bowl and cover it. Allow it to rise until doubled in size, approximately one hour. This fermentation process develops flavor and creates air pockets, essential for creating the desired texture.
Step 4: Divide the dough into equal pieces and shape into bagels.
Once risen, divide the dough into equal portions, typically 8 pieces. Shape each piece into a round ball, then poke a hole in the center. Stretch the hole to form a bagel. This shaping method not only provides the classic look but also ensures even cooking.
Step 5: Pre-boil bagels in a baking soda solution.
As a final step before baking, boil each bagel in water mixed with baking soda for about 1-2 minutes per side. This step is essential for achieving the iconic chewy crust and shiny finish. It also helps set the shape before the bagels hit the oven.
Step 6: Bake the bagels until golden brown.
Transfer the boiled bagels to a preheated oven at 425°F and bake until they turn golden brown, typically 20-25 minutes. This step brings out the flavors and gives the bagels a crisp crust while retaining their chewy interior. Pay attention to the color to avoid overbaking.
Step 7: Cool and enjoy your homemade bagels.
Once baked, allow the bagels to cool on a wire rack. This step ensures that the steam escapes, preventing sogginess. Enjoy them fresh, or slice and toast for added texture. Customize with your favorite spreads or enjoy them plain.

The Importance of Proper Dough Kneading
Kneading is a pivotal step in bagel-making, as it influences the dough’s structure and elasticity. This process develops gluten, which is essential for the signature chewy texture of a New York style bagel. An adequately kneaded dough will bounce back when pressed, indicating it’s ready for the next step.
Mastering the Boiling Technique
Boiling bagels before baking is what sets them apart from other bread types. This technique gelatinizes the surface starches, giving the bagels their unique crust. Adding baking soda increases the water's alkalinity, enhancing browning and flavor. Skipping this step could result in a less textured bagel.
Topping Options to Elevate Flavor
Toppings are an excellent way to customize your bagels and enhance their flavor profile. Traditional choices include sesame seeds and poppy seeds, but the possibilities are endless. Add your twist with everything seasoning, garlic, or even a sprinkle of cheese before baking for a personal touch that reflects your taste.
FAQs
What if my bagels turn out too tough?
If your bagels are too tough, it's likely due to over-kneading the dough. Ensure that you knead just until smooth and elastic, but avoid excessive handling.
Why do my bagels taste bland?
Bland bagels can result from insufficient salt in the dough or not enough toppings. Ensure you're accurately measuring salt and consider using flavorful toppings.
Can I make mini bagels with this recipe?
Yes! Simply divide the dough into smaller pieces for mini bagels. Adjust the boiling and baking time since they will cook faster.
What can I do if my dough doesn’t rise?
If your dough doesn’t rise, check if the water used for the yeast was too hot or too cold. Make sure to use warm water, around 110°F, and allow the yeast to activate properly.
How can I get my bagels extra shiny?
For an even shinier crust, brush the bagels with an egg wash right before baking. This will enhance both color and sheen.
My bagels have come out too thick. What can I do?
If your bagels are too thick, they may not have been boiled long enough. Adjust the boiling time to ensure they cook adequately before baking.
Conclusion
Creating New York style bagels at home can be a fun and fulfilling experience. The interplay of simple ingredients combined with traditional techniques results in a product that is incomparable to store-bought alternatives. As you perfect your craft, consider experimenting with different flavors and toppings to truly make the recipe your own.
Embrace the patience required in the process, from kneading to boiling, and celebrate the joy of sharing your homemade bagels with family and friends. Enjoy the satisfaction that comes with each slice, knowing that you have captured a taste of New York in your own kitchen.
Recipe Card
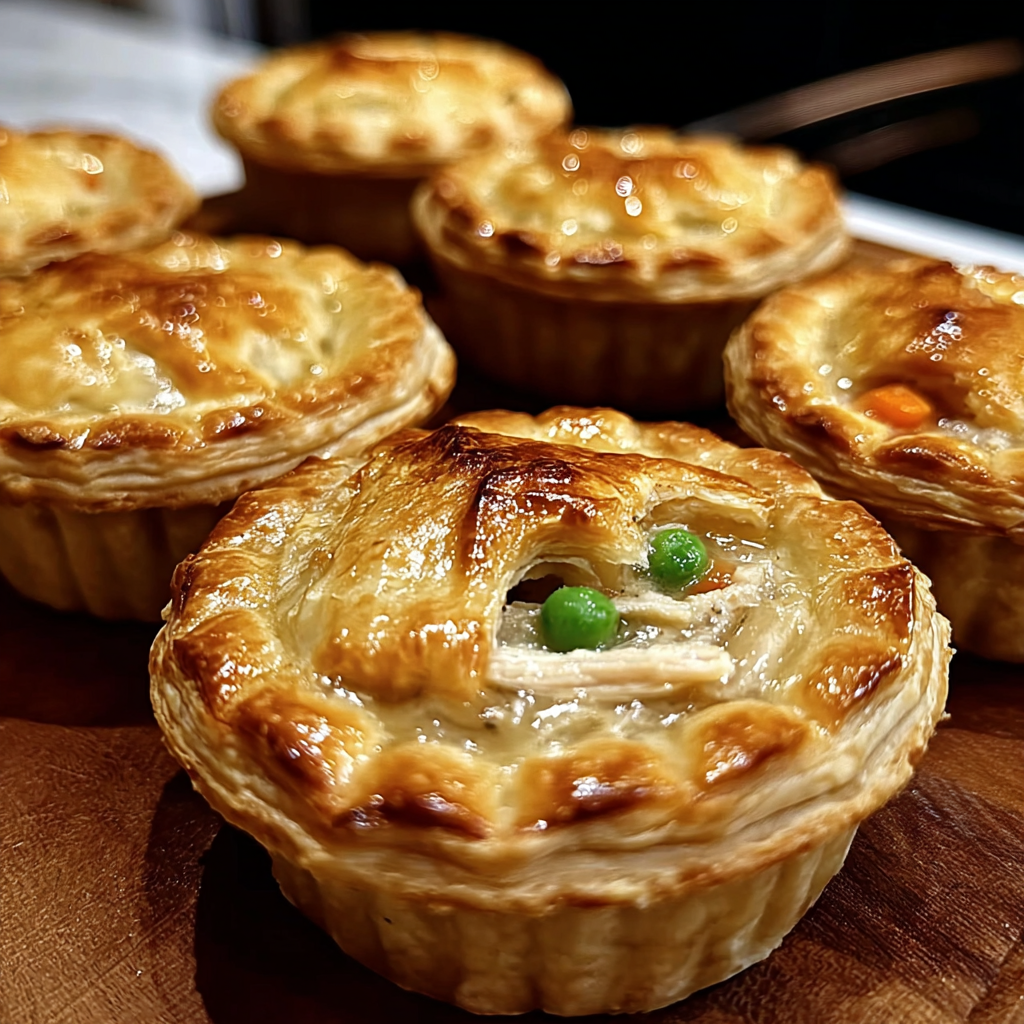
Deliciously Cozy Mini Chicken Pot Pies for Home Cooks
Ingredients
Method
- Preheat the oven to 400°F (200°C).
- In a large skillet, sauté the diced onions over medium heat until translucent.
- Add the shredded chicken and frozen vegetables to the skillet, cooking for about 5 minutes.
- Sprinkle the flour over the mixture and stir well to combine.
- Slowly add the chicken broth and heavy cream, stirring continuously until the mixture is smooth.
- Season with garlic powder, thyme, salt, and pepper, adjusting to taste.
- Remove the skillet from heat and let the filling cool slightly.
- Roll out the pie crusts and cut into circles to fit your muffin tin.
- Place the crusts in a greased muffin tin and fill each with the chicken mixture.
- Top each pie with an additional circle of crust, sealing the edges and slitting the tops for steam.
- Brush the tops with the beaten egg for a golden finish.
- Bake in the preheated oven for 20-25 minutes or until the crust is golden brown.
- Let the mini pot pies cool for a few minutes before serving.
Notes
Additional serving suggestions: pair with a crisp salad, garlic bread, or roasted seasonal vegetables for balance.
For make-ahead, prep components separately and assemble just before heating to preserve texture.
Taste and adjust with acid (lemon/vinegar) and salt right at the end to wake up flavors.


