Introduction
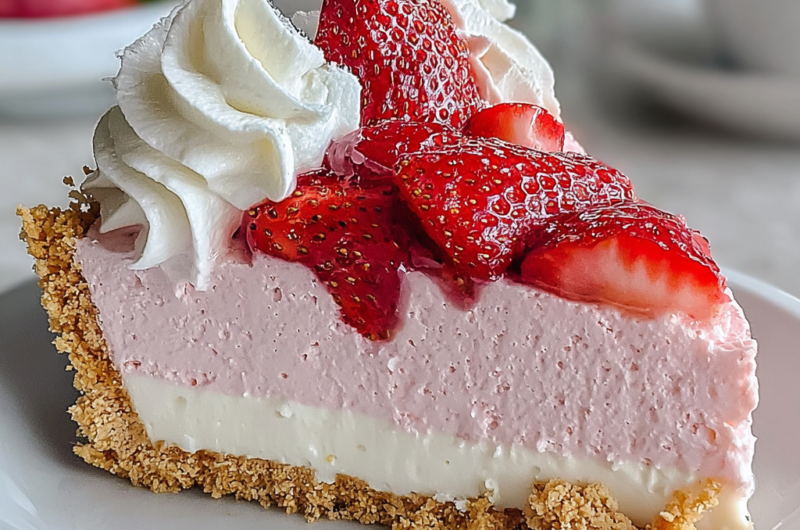
No-bake strawberry cheesecake is a luscious dessert perfect for any occasion. Its creamy texture and vibrant berry flavor capture the essence of summer, making it a delightful choice year-round.
Unlike traditional cheesecakes that require baking, this no-bake version is a breeze to prepare. It combines simple ingredients to create a rich and satisfying treat without the hassle of an oven.
Ingredients
- 2 cups graham cracker crumbs
These crumbs form the base of your cheesecake, providing a crunchy texture that nicely contrasts with the creamy filling. They also absorb moisture, ensuring your crust holds up well. - 1/2 cup unsalted butter, melted
Butter binds the graham cracker crumbs together, giving the crust its shape and richness. It adds flavor and helps create a sturdy, unyielding base for your cheesecake. - 8 oz cream cheese, softened
Cream cheese is the star of the filling, contributing to the cheesecake’s signature tangy flavor and creamy texture. Softening it makes it easier to blend, ensuring a smooth filling. - 1 cup powdered sugar
Powdered sugar sweetens the filling without the graininess that granulated sugar might cause. It dissolves easily into the cream cheese, achieving a velvety consistency. - 1 tsp vanilla extract
Vanilla extract enriches the flavor profile of the cheesecake, providing a warm undertone that complements the strawberries beautifully. It adds depth to the overall taste. - 2 cups fresh strawberries, pureed
The strawberry puree adds natural sweetness and vibrant color, making your cheesecake visually appealing. Strawberries also contribute to the refreshing taste, enhancing the overall experience. - 1/2 cup heavy whipping cream
Whipping cream is essential for creating a light and airy texture in the cheesecake filling. It helps achieve that luxurious creaminess that makes no-bake cheesecakes so irresistible. - 1 cup fresh strawberries, sliced for garnish
Additional strawberries not only enhance the visual appeal but also provide a burst of fresh flavor and texture when served atop the cheesecake, making each bite more enjoyable.
Directions & Preparation
Step 1: Prepare the crust
Start by combining the graham cracker crumbs and melted butter in a mixing bowl. This step is crucial because it determines the texture and flavor of your crust. Make sure the crumbs are fully coated with butter to ensure they stick together when pressed into the pan. Use a 9-inch springform pan for easy removal once the cheesecake sets.
Step 2: Press the crust into the pan
Once your mixture is prepared, firmly press it into the bottom of the pan to create an even layer. This process helps the crust hold its shape when you slice the cheesecake. It’s important to pack it down well; you can use the back of a measuring cup to ensure an even thickness across the base.
Step 3: Make the filling
In a separate bowl, beat the softened cream cheese until smooth, then gradually mix in the powdered sugar and vanilla extract. This step is essential for achieving a creamy, lump-free filling. Take your time mixing to ensure all ingredients are well combined, which will enhance the flavor and texture.
Step 4: Add the strawberry puree
Fold in the strawberry puree gently to the cream cheese mixture. This step integrates the flavors, giving the filling a beautiful pink hue while ensuring the cheesecake remains light and airy. Use a spatula for folding, as it minimizes the risk of deflating the whipped cream.
Step 5: Whip the heavy cream
In a separate bowl, whip the heavy cream until soft peaks form. This step adds a cloud-like effect to the filling, making it wonderfully light. It's important not to over-whip the cream, as this can turn it grainy and affect the creaminess of your cheesecake.
Step 6: Combine the mixtures
Carefully fold the whipped cream into the strawberry cream cheese mixture until well combined. This gentle folding technique is crucial to maintain the airy texture, ensuring that your cheesecake remains fluffy and light without becoming dense.
Step 7: Pour filling over the crust
Pour the creamy filling over your prepared crust, smoothing it out with a spatula. This step helps distribute the filling evenly, ensuring each slice will have a balanced amount of crust and creamy filling. A gentle tap on the counter can help eliminate any air bubbles.
Step 8: Chill the cheesecake
Cover the cheesecake with plastic wrap and refrigerate for at least 4 hours or preferably overnight. Chilling is essential for the cheesecake to set properly, allowing the flavors to meld beautifully and making it easier to slice later.
Step 9: Garnish and serve
Once set, remove the cheesecake from the springform pan and garnish with sliced strawberries. This final touch not only adds freshness but visually elevates your dessert, making it look as delightful as it tastes. Use a sharp knife for clean cuts, ensuring each slice showcases the layers.

The Importance of Strawberry Quality
When making a no-bake strawberry cheesecake, the quality of your strawberries significantly influences the final taste. Opt for fresh, ripe strawberries, as they will provide the best flavor and sweetness. You can even blend in some less-than-perfect berries for the puree while reserving the best ones for garnish—this balance ensures that you maximize flavor without wasting any fruit.
Experimenting with Flavors
While strawberries are the star of this cheesecake, feel free to experiment with other fruits or flavorings. Blueberries, raspberries, or even a swirl of chocolate can add a delightful twist to the traditional recipe. By integrating different flavors, you can tailor the cheesecake to your preferences and those of your guests, making each version a unique culinary creation.
Perfecting the Texture
Achieving the perfect texture in no-bake cheesecakes requires careful attention to ingredient proportions and mixing techniques. Ensuring that your cream cheese is softened properly helps in avoiding lumps. Furthermore, whipping the cream to the right consistency is critical, as it provides that airy lightness. Balancing the cream cheese and whipped cream will lead to a cheesecake that is both firm and creamy.
FAQs
Why is my cheesecake too runny?
If your cheesecake is runny, it may not have chilled long enough. Ensure you refrigerate it for at least 4 hours, but preferably overnight, to allow the mixture to set properly.
Can I use frozen strawberries in this recipe?
Yes, you can use frozen strawberries, but thaw them and drain excess liquid before pureeing to prevent a watery filling.
Why does my filling taste bland?
Bland filling could be due to insufficient sweetness or flavor from the strawberries. Adjust the sugar or incorporate a bit of additional vanilla or lemon juice to enhance the flavor.
What if my crust is too crumbly?
If your crust crumbles when cutting, it likely needs more butter. Adjust the butter quantity in your next attempt to create a firmer base.
Can I use a different type of crust?
Absolutely! You can substitute the graham crackers with digestive biscuits, Oreo cookies, or even a nut-based crust for a different flavor profile.
Why is my whipped cream not holding its shape?
If your whipped cream isn’t holding shape, it might have been over-whipped or not whipped long enough. Aim for soft peaks, and be cautious not to overmix.
Conclusion
No-bake strawberry cheesecake is the perfect dessert for those who appreciate ease in preparation without sacrificing taste. With its creamy texture and refreshing fruit flavors, this cheesecake is sure to satisfy any sweet tooth.
Whether enjoying it on a warm summer's day or at a cozy gathering, this dessert brings a sense of delight and indulgence to the table. Dive into this recipe and share the joy of homemade treats.
Recipe Card
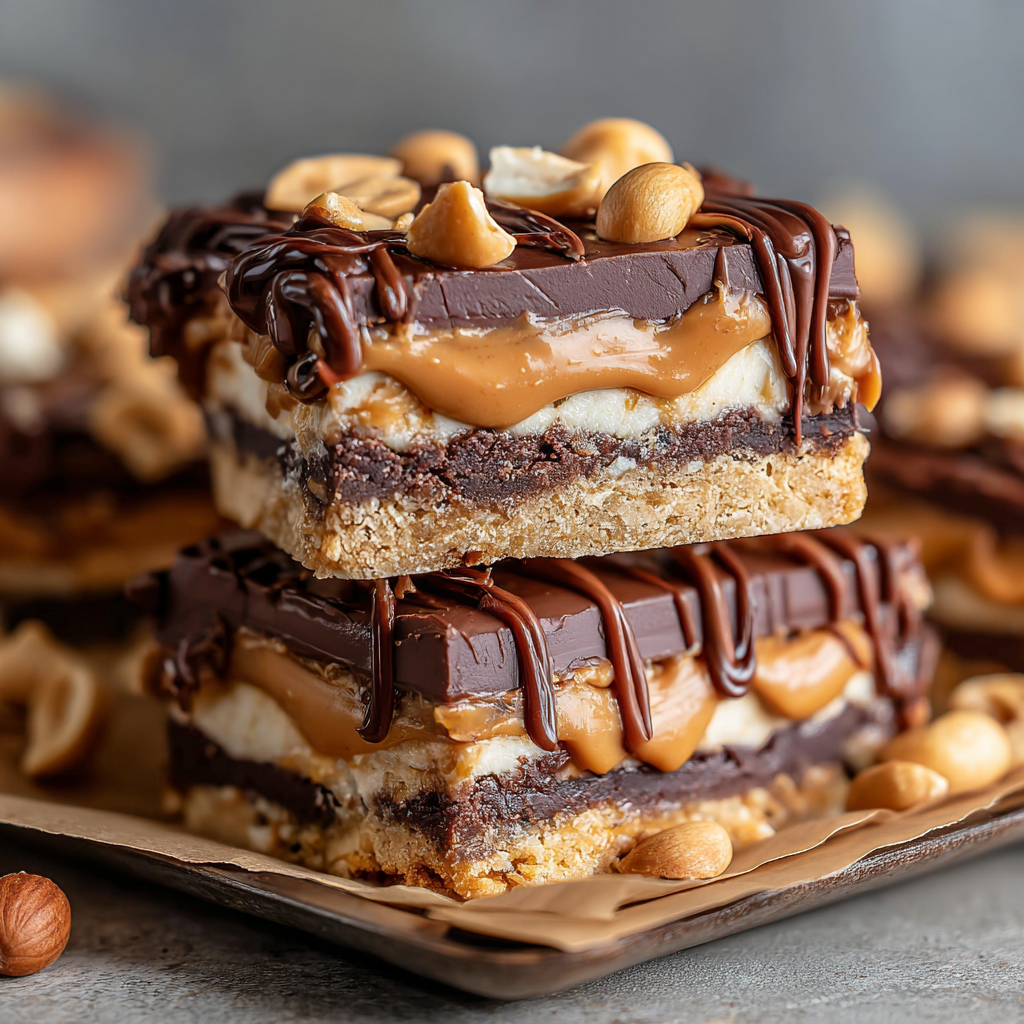
Indulge in Chocolate Peanut Butter Dream Bars
Ingredients
Method
- Preheat the oven to 350°F (180°C).
- In a mixing bowl, combine flour, cocoa powder, granulated sugar, and brown sugar.
- Add melted butter to the dry ingredients and stir until combined.
- Press the dough into a lightly greased baking dish and bake for 15 minutes.
- In a clean bowl, mix together peanut butter and milk until smooth.
- Spread the peanut butter mixture over the baked crust.
- Melt the chocolate chips in the microwave or over a double boiler.
- Pour the melted chocolate over the peanut butter layer and spread evenly.
- Top with chopped peanuts if desired, and let it cool completely before slicing.
Notes
Additional serving suggestions: pair with a crisp salad, garlic bread, or roasted seasonal vegetables for balance.
For make-ahead, prep components separately and assemble just before heating to preserve texture.
Taste and adjust with acid (lemon/vinegar) and salt right at the end to wake up flavors.


