Introduction
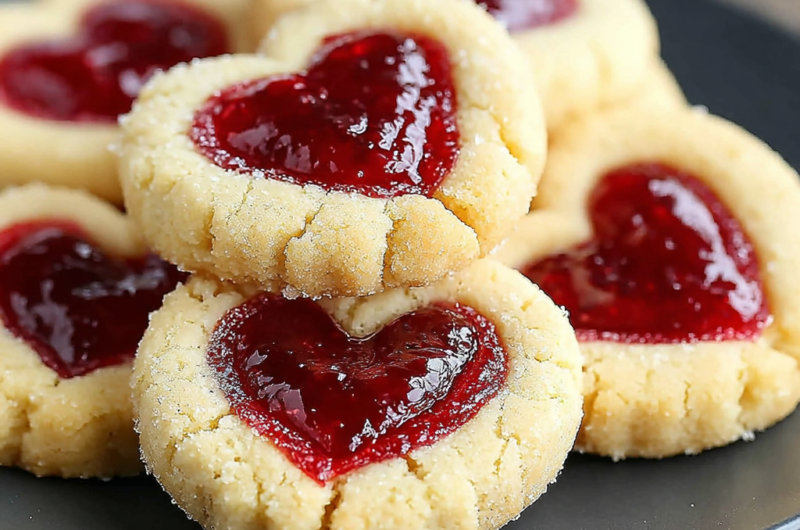
Heart Jam Thumbprint Cookies are more than just a sweet treat; they are a token of love and warmth that fills any kitchen with delightful aromas. Perfect for gifting or for enjoying during cozy afternoons, these cookies offer a beautiful combination of buttery texture and fruit-filled sweetness.
The process of making these thumbprint cookies is simple yet rewarding, and they can be personalized with your favorite jams or preserves. With their inviting heart shape and vibrant colors, they not only taste great but look delightful on any dessert table.
Baking these cookies can also be a fun activity to share with loved ones, making it an ideal recipe for family gatherings or celebrations. Let’s uncover the essentials behind creating these decadent heart-shaped jam cookies.
Ingredients
- 1 cup unsalted butter, softened
Butter adds richness and flavor, contributing to the cookies' tender texture. Softened butter ensures that it creamed properly with sugar, allowing for better aeration and an airy texture. - 3/4 cup granulated sugar
Sugar not only sweetens the cookies but also contributes to their texture and browning. It helps to create a crisp exterior while keeping the inside soft and chewy. - 1 large egg
The egg acts as a binder that holds the dough together while providing moisture. It also aids in leavening, which helps the cookies rise slightly as they bake. - 2 tsp vanilla extract
Vanilla extract enhances the overall flavor profile of the cookies, injecting a warm, sweet aroma that complements the fruity jam. It makes the cookies taste even more inviting. - 2 cups all-purpose flour
Flour is the base of the dough, providing structure. All-purpose flour allows for a balanced texture that’s soft but strong enough to hold its shape. - 1/4 tsp salt
Salt enhances the flavors of sweet ingredients and balances the overall taste, making the cookies more flavorful. A pinch is all it takes to elevate the sweetness. - 1 cup fruit jam (strawberry, raspberry, or your choice)
The jam serves as the delightful filling that makes these cookies special. It adds moisture, flavor, and a vibrant color, making the heart-shaped thumbprint stand out.
Directions & Preparation
Step 1: Preheat the oven to 350°F (175°C).
Preheating the oven is crucial for ensuring that your cookies bake evenly and at the right temperature from the start. It prevents the dough from spreading too quickly and allows for proper structure and texture.
Step 2: Cream the softened butter and sugar together in a large bowl until light and fluffy.
Creaming the butter and sugar thoroughly is essential because it incorporates air into the mixture, leading to a lighter cookie. Aim for a pale-colored mixture that has expanded in volume, indicating that the butter is well-aerated.
Step 3: Add the egg and vanilla extract, mixing until combined.
Incorporating the egg and vanilla at this stage is important for creating a smooth and homogenous batter. This combination enriches the dough and infuses it with flavor that’s crucial for the overall taste.
Step 4: In another bowl, whisk together the flour and salt.
Whisking dry ingredients together helps to evenly distribute the salt and flour, ensuring homogeneous incorporation into the wet mixture. This step is vital to prevent clumps and achieve a consistent cookie dough.
Step 5: Gradually add the flour mixture to the butter mixture, mixing until just combined.
Mixing only until combined is key to keeping the cookies tender. Overmixing could lead to tough cookies as the gluten develops in the flour, ruining the desired texture.
Step 6: Form the cookie dough into balls and place them on a baking sheet lined with parchment paper.
Shaping the dough into consistent balls ensures even baking. Parchment paper prevents sticking and promotes easy removal, which is crucial for keeping the cookies intact.
Step 7: Using your thumb or a small spoon, make an indentation in the center of each cookie.
Creating a well for the jam is important for serving purposes and aesthetics. This step ensures that there's a nice pocket for the jam to sit, preventing it from bubbling over and into the cookie.
Step 8: Fill each indentation with fruit jam.
Filling the cookies with jam not only provides sweet flavor but also ensures that the center remains moist during baking. Use enough jam to fill the wells without overflowing, which could lead to messy cookies.
Step 9: Bake for 12-15 minutes or until the edges are lightly golden.
Baking until the edges are golden gives visual cues of doneness. The cookies should remain soft in the center; they will continue to firm up as they cool. Keep a close eye as ovens can vary.
Step 10: Allow the cookies to cool on the baking sheet for a few minutes before transferring to a wire rack.
Cooling on the baking sheet allows the cookies to firm up slightly, making them easier to move. Transferring to a wire rack afterwards helps them cool evenly and retain their texture.

Choosing the Right Jam for Your Cookies
The choice of jam can significantly influence the flavor of your Heart Jam Thumbprint Cookies. While traditional options like strawberry and raspberry are popular, don’t hesitate to experiment with apricot, blueberry, or even seasonal fruit jams. Each variety lends a unique character to the cookies, complementing the buttery dough with bright, fruity notes.
Customizing for Special Occasions
These cookies can easily become a centerpiece for any occasion with a few simple tweaks. Consider adding sprinkles or edible glitter on top of the jam for a festive touch, or adjusting the dough with spices like cinnamon or nutmeg to evoke seasonal flavors. Personalizing these cookies elevates them from everyday treats to special offerings perfect for holidays and celebrations.
Perfect Pairings: With What to Enjoy These Cookies
Heart Jam Thumbprint Cookies are delightful on their own but can be taken to another level when paired with beverages. Enjoy them with a cup of hot tea or coffee for a cozy afternoon snack. For a sweeter finish, consider serving them alongside a dollop of whipped cream or ice cream for a decadent dessert experience that rounds out a meal beautifully.
FAQs
What if my cookie dough is too thick?
If your dough is too thick, it may be due to excess flour. Try adding a touch of softened butter or a few drops of milk to loosen it up. Mix until the desired consistency is reached, but be careful not to overmix.
Can I use other types of flour for this recipe?
Yes, you can experiment with different flours such as whole wheat or almond flour. Keep in mind that this may alter the texture and flavor, so adjustments may be needed for the proper outcome.
What can I do if my cookies are bland?
If your cookies taste bland, consider adjusting the sweetness with a bit more sugar, or enhancing the flavor with additional vanilla extract or a pinch of cinnamon to elevate the overall experience.
What if my cookies spread too much while baking?
If your cookies spread too much, it could be due to softened butter being too warm or an imbalance in the flour-to-fat ratio. Make sure to chill the dough for about 30 minutes before baking to prevent excessive spreading.
Can I use low-sugar jam in this recipe?
Absolutely! Low-sugar or no-sugar-added jams can be used, but just ensure that they have a good consistency to prevent too much liquid from affecting the dough during baking.
What if I want to add nuts to the dough?
You can add finely chopped nuts to the dough for added texture and flavor. Aim for about 1/2 cup of finely chopped nuts to incorporate without overpowering the dough.
Conclusion
Heart Jam Thumbprint Cookies are not just tasty; they carry a charm that brings together flavors and memories. Baking them can be a wonderful way to connect with family or friends, sharing the joy they bring.
As you try this recipe, don’t hesitate to make it your own by experimenting with flavors and fillings. After all, every cookie tells a story, and each customization can inspire new traditions in your kitchen.
Recipe Card

Indulgent Kahlua Chocolate Cakes for Every Occasion
Ingredients
Method
- Preheat the oven to 350°F (175°C).
- Grease two 9-inch round cake pans and line the bottoms with parchment paper.
- In a large bowl, sift together the flour, cocoa powder, baking soda, and salt.
- In another bowl, cream the softened butter and sugar until light and fluffy.
- Add the eggs, one at a time, and mix until well combined.
- Stir in the Kahlua and vanilla extract until blended.
- Alternate adding the dry ingredients and buttermilk to the butter mixture, beginning and ending with the dry ingredients.
- Divide the batter evenly between the prepared pans.
- Bake for 25 to 30 minutes, or until a toothpick inserted in the center comes out clean.
- Let the cakes cool in the pans for 10 minutes before transferring to a wire rack.
- Frost with your favorite frosting once completely cooled.
Notes
Additional serving suggestions: pair with a crisp salad, garlic bread, or roasted seasonal vegetables for balance.
For make-ahead, prep components separately and assemble just before heating to preserve texture.
Taste and adjust with acid (lemon/vinegar) and salt right at the end to wake up flavors.


