Introduction
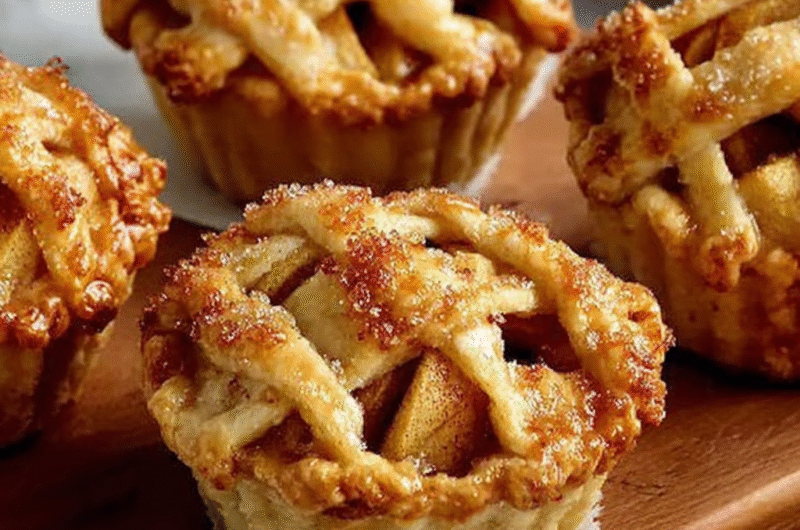
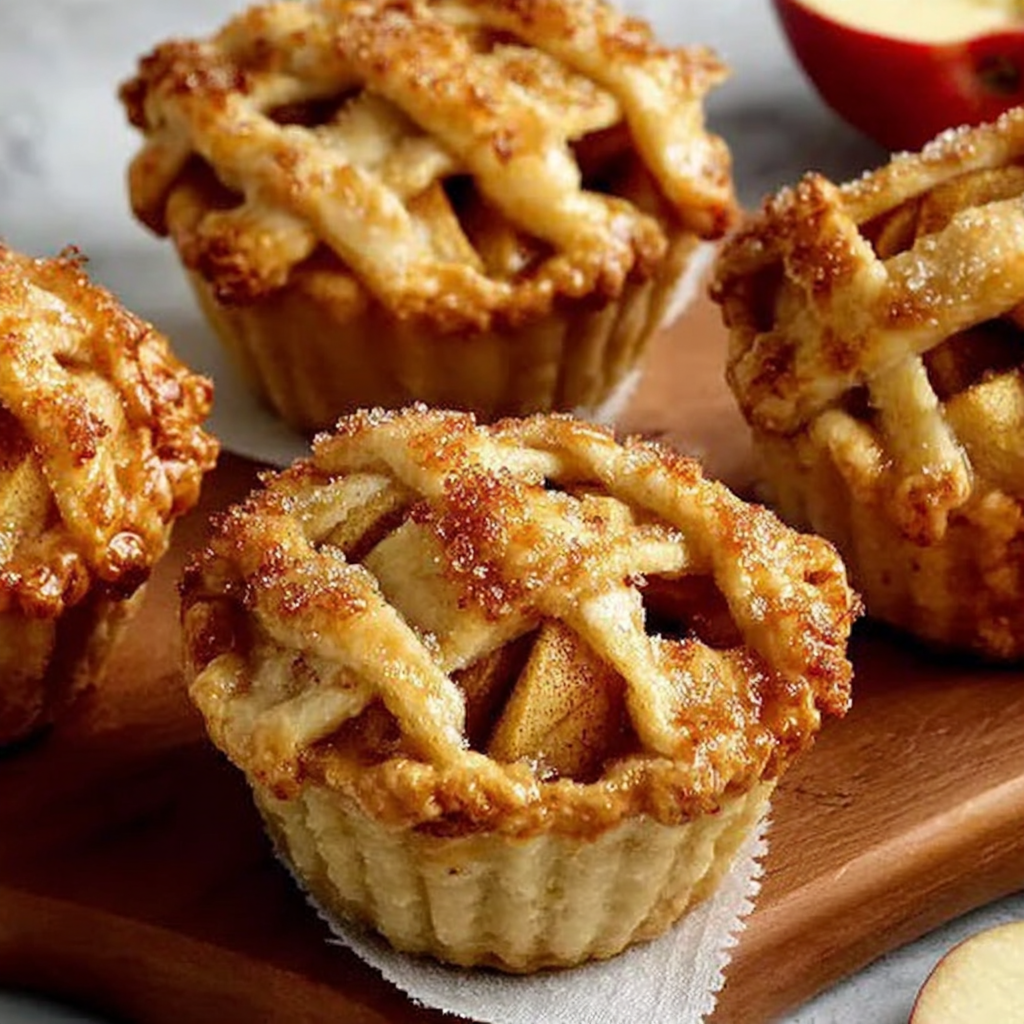
Mini apple pies are a delightful twist on a classic dessert, perfect for fall gatherings or cozy family dinners. These petite pastries not only capture the warmth of baked apples but also offer a perfect portion for everyone. With their flaky crust and spiced filling, they embody the essence of comfort food.
The beauty of mini apple pies lies in their versatility. You can customize the flavors by choosing different spices or apples, and they are an ideal way to use up seasonal fruit. Baking these treats fills your kitchen with a sweet aroma, making every moment spent in front of the oven worthwhile.
Ingredients
- 2 cups all-purpose flour
The foundation of your pie crust, all-purpose flour provides the structure and creates a flaky texture when properly combined with fat. - 1 teaspoon salt
Salt enhances the overall flavor of the crust, balancing the sweetness and lending depth to the final product. - 1 cup unsalted butter, chilled and diced
Butter contributes richness and flavor, while chilling it helps maintain a flaky consistency in the crust. - 6–8 tablespoons ice water
Ice water is added to hydrate the flour without melting the butter, ensuring a tender crust. - 3 medium apples, peeled, cored, and diced
Apples are the star ingredient, providing natural sweetness and moisture while offering a lovely texture when baked. - 1/2 cup granulated sugar
Sugar adds sweetness to the filling and helps create a delicious caramelization during baking, enhancing the overall flavor. - 1 teaspoon cinnamon
Cinnamon is a classic spice for apple dishes, adding warmth and a comforting aroma that accentuates the apples' natural flavors. - 1 tablespoon lemon juice
Lemon juice brightens the flavor of the apples and helps prevent browning, keeping the filling vibrant. - 1 tablespoon cornstarch
Cornstarch thickens the filling and prevents it from becoming too runny as the pies bake. - 1 egg, for egg wash
Beaten egg brushed on the crust creates a shiny, golden finish, making your mini pies visually appealing.
Directions & Preparation
Step 1: Prepare the crust
Start by mixing the flour and salt in a bowl. Adding chilled butter, use a pastry cutter or your fingers to work it into the flour until it resembles coarse crumbs. This step is crucial, as well-prepared butter creates layers in the crust, which will result in a flakier texture. Gradually add ice water, one tablespoon at a time, mixing until the dough comes together. Make sure not to overwork the dough to avoid a tough crust.
Step 2: Chill the dough
After shaping the dough into a disk, wrap it in plastic wrap and refrigerate for at least 30 minutes. Chilling the dough not only firms it up, making it easier to roll out later, but also relaxes the gluten. This results in a tender and flaky crust that perfectly contrasts the soft apple filling.
Step 3: Prepare the apple filling
In a large bowl, combine the diced apples, sugar, cinnamon, lemon juice, and cornstarch. Tossing the ingredients until well combined ensures that each apple piece is coated with flavor. This step is important for even flavor distribution; as the filling bakes, the sugar and spices will marry with the natural juices of the apples, creating a rich, sweet filling.
Step 4: Preheat the oven
As you begin to assemble your mini pies, preheat the oven to 375°F (190°C). Preheating is essential for ensuring that your pies bake evenly. It allows the crust to set quickly, yielding that desired golden-brown finish and preventing sogginess.
Step 5: Roll out the dough
Once chilled, roll out the dough on a floured surface to about 1/8 inch thick. Use a round cutter or a glass to cut out circles for the pie crusts. This process allows for an even thickness, which supports proper baking. Remember to sprinkle flour on your surface to prevent sticking, ensuring smooth transfers of cut dough circles.
Step 6: Assemble the mini pies
Place the dough circles into greased muffin tins, pressing them gently into the bottom and up the sides. Fill each with the apple mixture, leaving a little space at the top for the crust. This layering technique ensures the apples expand while baking without overflowing. Cut out smaller circles or stars for the tops, allowing steam to escape while adding a decorative touch.
Step 7: Bake the pies
Brush the tops of the pies with the egg wash for a beautiful golden finish. Bake in the preheated oven for 20-25 minutes, or until the crust is golden brown and the filling is bubbling. The baking time can vary slightly based on your oven, so keep an eye on them. The aroma of cinnamon and baked apples will signal that they are nearing perfection.
Step 8: Cool and serve
Once baked, allow the mini apple pies to cool in the tin for about 10 minutes before transferring to a wire rack. Cooling prevents the bottoms from becoming soggy while also ensuring they're set enough to hold their shape. Enjoy them warm or at room temperature, perhaps with a scoop of vanilla ice cream on the side for a delightful pairing.

Choosing the Right Apples
The type of apples you choose can drastically impact the flavor and texture of your mini pies. Tart varieties like Granny Smith or Honeycrisp bring balance to the sweetness of the filling, while sweeter apples like Fuji or Gala create a deliciously sweet treat. Mixing different types can also provide a more complex flavor profile, giving your pies a unique touch.
Tips for Flaky Crusts
Achieving a flaky crust is an art and requires careful handling of the dough. Ensure your butter remains cold and avoid overworking the dough. Rolling it out between sheets of parchment paper can prevent sticking and make transferring the dough easier. Moreover, letting the dough rest in the fridge not only makes it easier to roll but also helps in developing a tender, flaky texture.
Serving Suggestions
Mini apple pies are wonderfully versatile when it comes to serving options. Pair them with a scoop of vanilla ice cream or whipped cream for added decadence. For an adult twist, consider drizzling them with salted caramel or bourbon sauce. Garnishing with a sprinkle of additional cinnamon or a dusting of powdered sugar can elevate their presentation.
FAQs
What if my apple filling is too sweet?
If the filling tastes too sweet, consider adding a teaspoon of lemon juice or a pinch of salt to balance the flavors.
Can I use other fruits in these mini pies?
Yes, you can substitute apples with other fruits like pears, berries, or even a mix for a unique flavor.
What should I do if my crust is too thick?
If your crust feels thick, roll it out more evenly and thinner next time, ensuring an even thickness for proper baking.
How can I make the pies look more appealing?
Enhance the appearance by using decorative cutters for the crust tops and brushing them with egg wash for a lovely sheen.
What if my dough cracks while rolling?
If the dough cracks, let it rest for a few minutes to relax, then gently knead and re-roll it for a smoother finish.
Can I use whole wheat flour instead of all-purpose flour?
Yes, whole wheat flour can be used, but it may yield a denser crust. Adjust by adding more water if needed.
Conclusion
Creating mini apple pies is a rewarding experience that fills your home with comforting aromas and satisfies sweet cravings. By following these steps and customizing flavors, you can craft a dessert that is uniquely yours.
These treats are versatile enough for any occasion, offering a delightful balance of flavors and textures. Whether enjoyed warm from the oven or at room temperature, mini apple pies are sure to impress everyone at your table.
Recipe Card
Delightful Mini Apple Pies for Any Occasion
Ingredients
Method
- Prepare the crust
- Chill the dough
- Prepare the apple filling
- Preheat the oven
- Roll out the dough
- Assemble the mini pies
- Bake the pies
- Cool and serve
Notes
Additional serving suggestions: pair with a crisp salad, garlic bread, or roasted seasonal vegetables for balance.
For make-ahead, prep components separately and assemble just before heating to preserve texture.
Taste and adjust with acid (lemon/vinegar) and salt right at the end to wake up flavors.


